
Hey Everyone,
So, I finally I got my hands on the two of CampingCo gears, the Molle Panel and the Rear Door Table, for folks who have limited time deciding, here’s the gist: it’s okay for the price. The quality is decent and won’t rattle around and I highly recommend you tie down your stuff with the provided holes and seek additional help while installing. It’s a fairly simple procedure that won’t take more than 10 mins with the right tools. IF you have seat height risers, you would lose the top one or two inches of the rear window. Now, just don’t bother with the table, get it if you absolutely feel you need it, but mind that you add two more bolts on the top frame for extra sturdiness and do not load anything more than 5 to 7 KGs max.
Now, coming to the long version since you have the time, patience and the interest, I thank you for that.
The Molly Panel
Starting off with the quality, it’s just a sheet of metal that’s got holes punched all over it. The design is very simple and basic, yet doesn’t say a word about being flimsy. It’s durable enough and for the money, that’s alright. The reason being you shouldn’t add too much weight than needed. It’s a fine balance between “too heavy for the use” and “it’ll fall off” bar, and it comes right in the range of “good enough for the purpose” midrange.
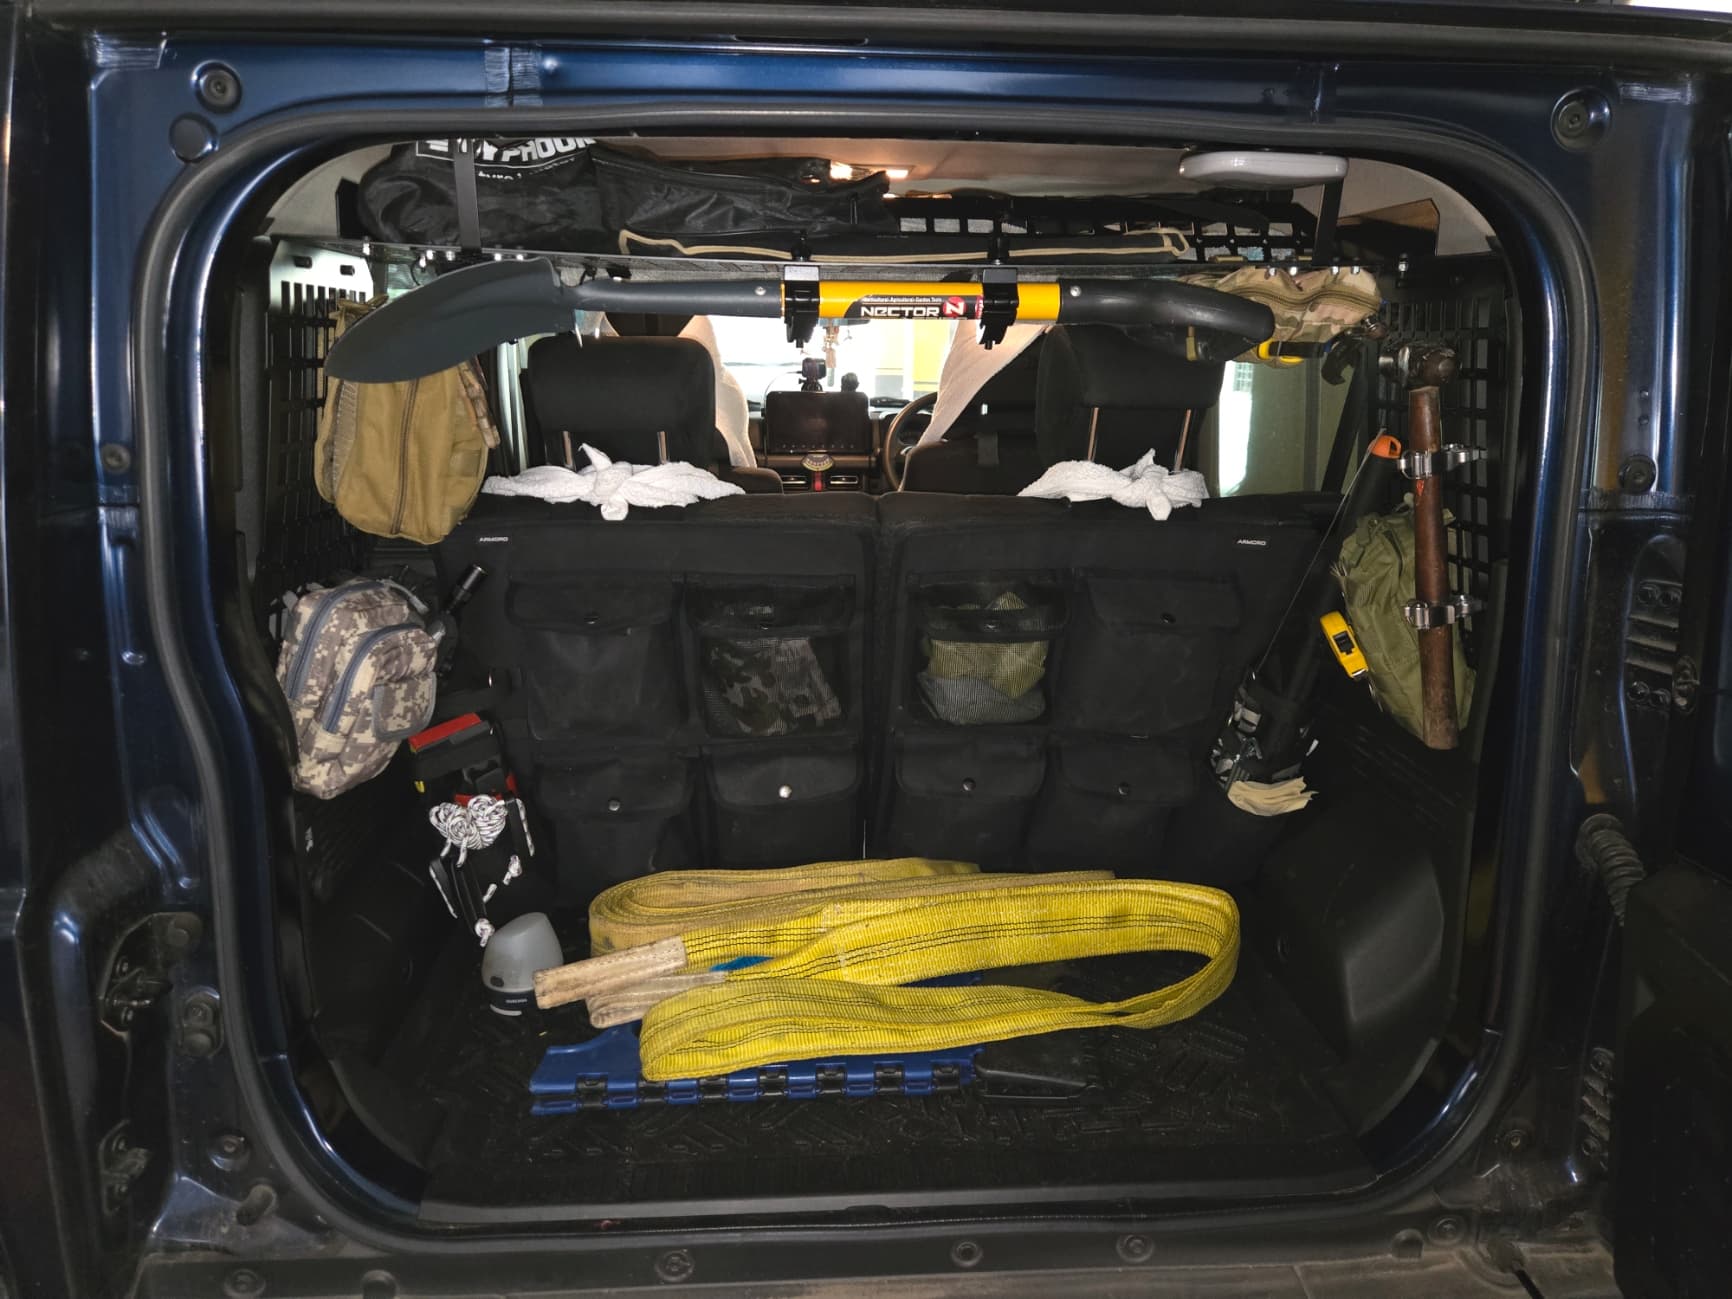
Coming to the package itself, you get three panels, left, right and the top. a bunch of screws and bolts and finally a pair of “walls” to be on either side of the top panel so that if you in case “forget” to tie down your stuff like I did, they won’t fall off the sides while you corner on the roads or go adventurous tilting.
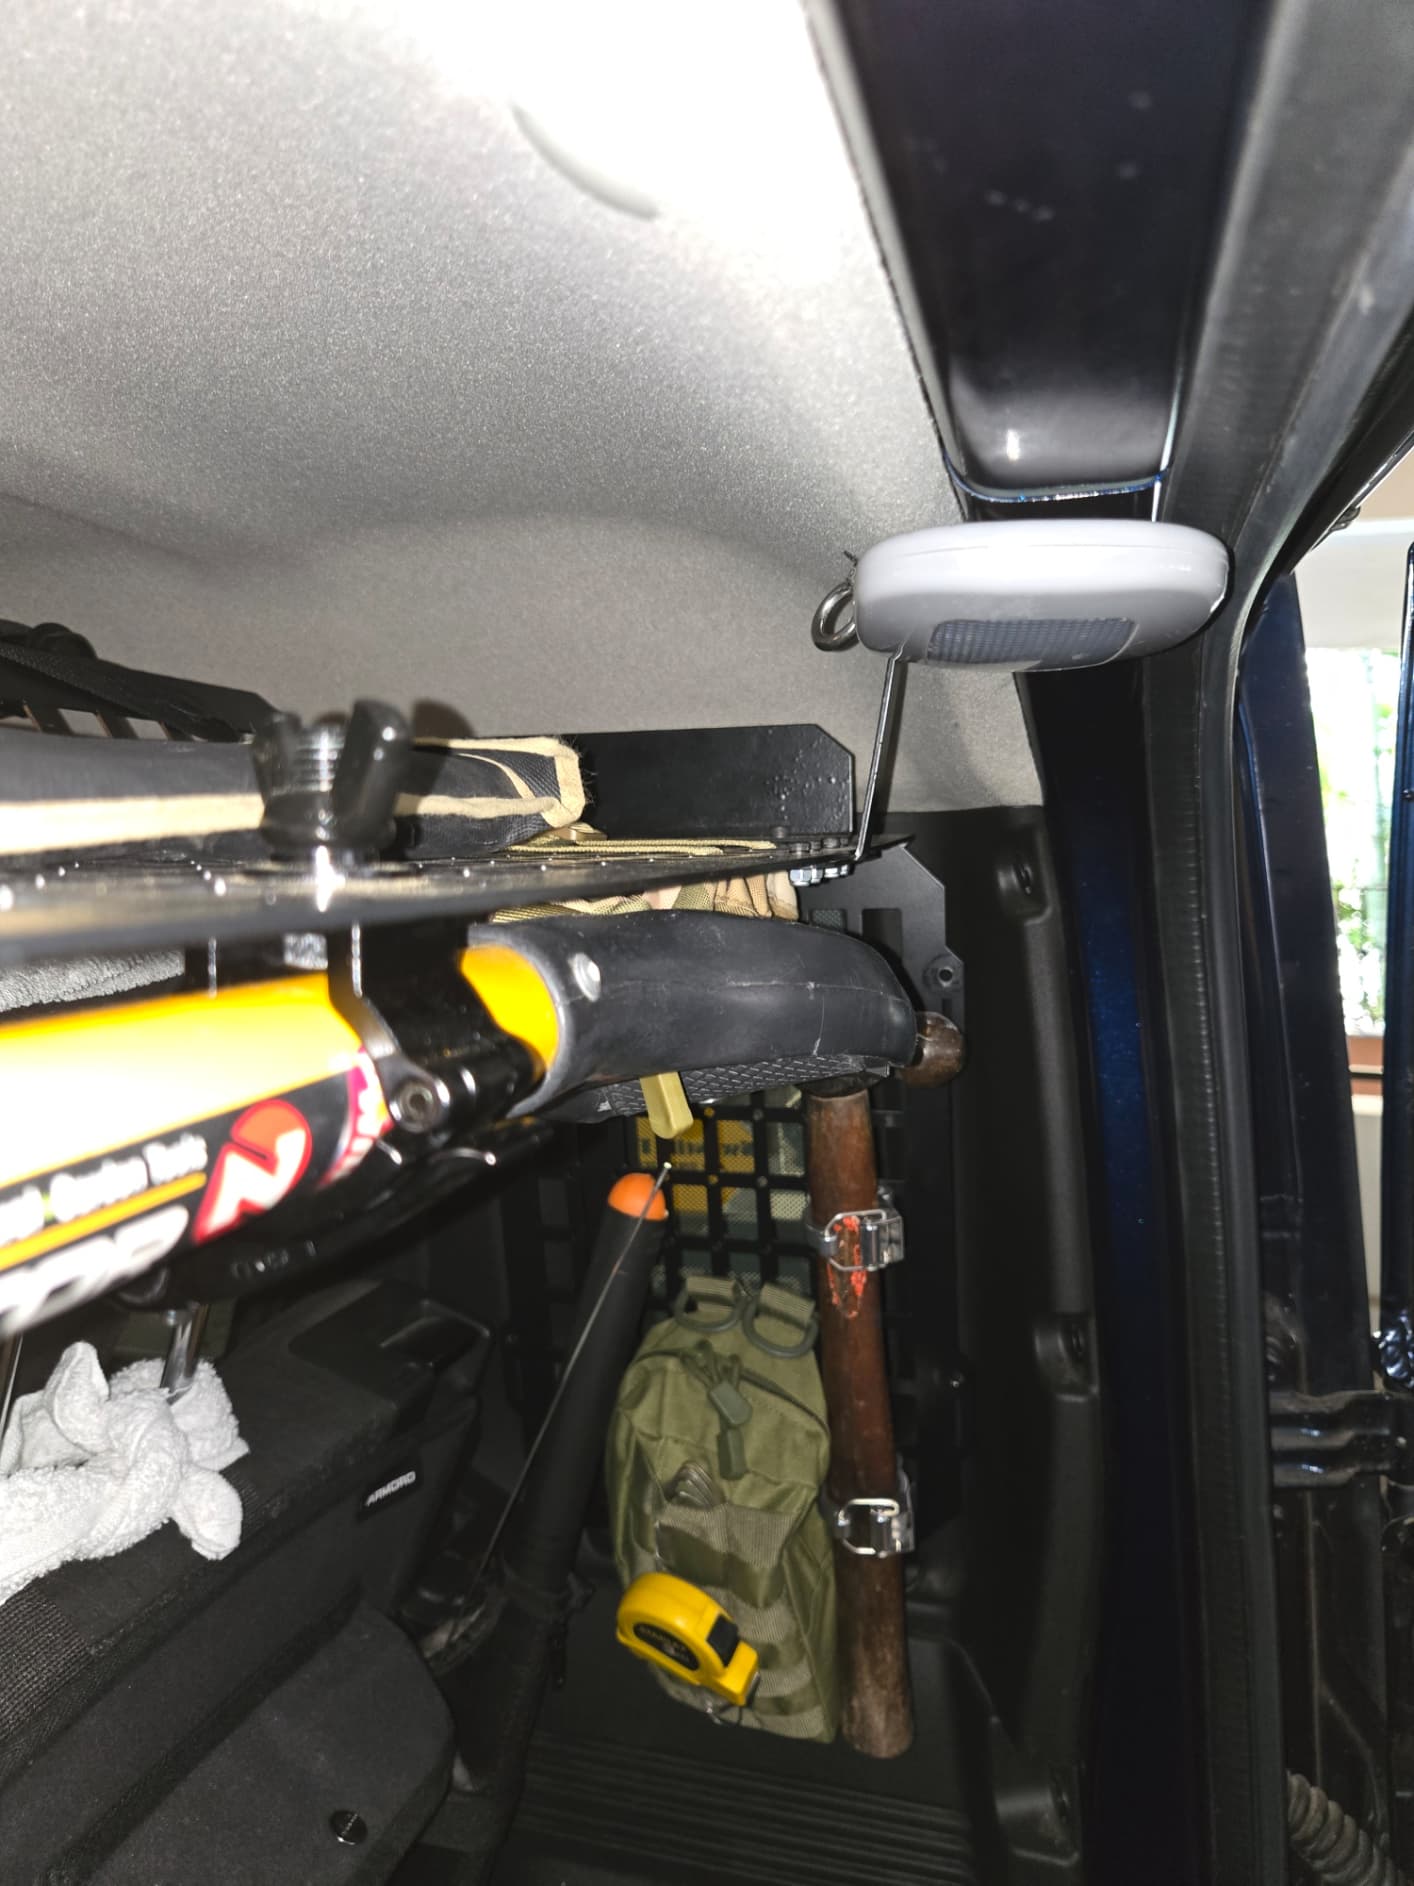
Installation is simple, but would have helped with any instruction manual or a video that’s to the point and not super long where I have to search for the bits and pieces. There a total of 6 mounting points, four on the M6 bolts under the windows and two vertical flats that’s holding from the roof that bolts onto the upper panel.
Basically you bolt the left and right panels to the top panel on the ends (obviously duh)
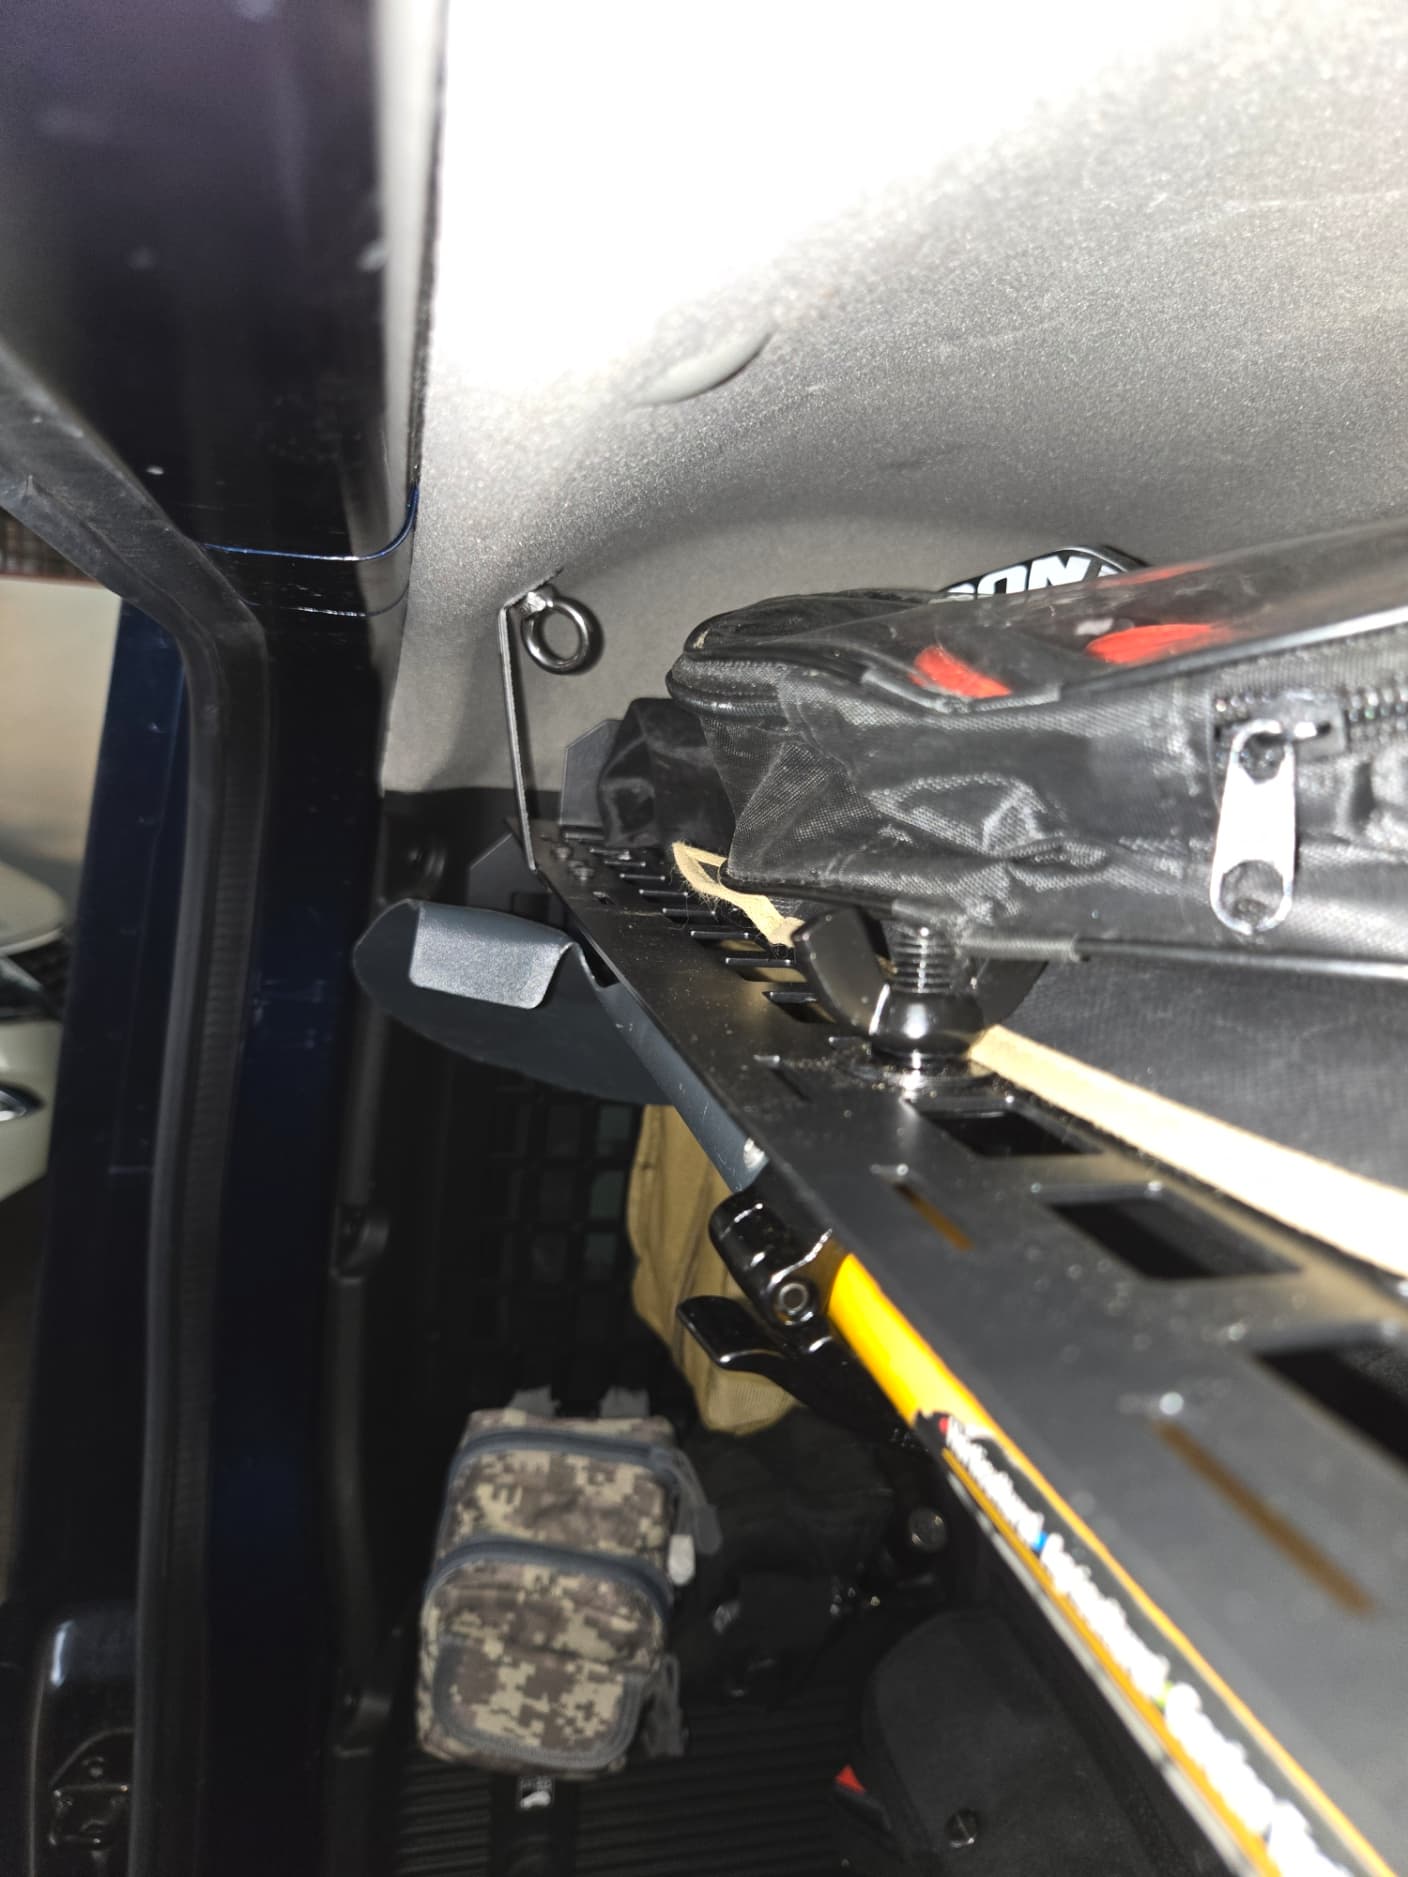
BUT, here’s the trick (HA!!) the video says to keep bolt the panels on the OUTSIDE of the top panel, the top panel is bent on either side to accommodate the side panels, this way all the load is on the small (M4?) poor bolts. I’m not happy with stressing out those poor fellas so much, so I recommend keeping the panels towards the INSIDE of the panel like in the below image, such that the top panel encompasses the side panels and sits on top of the side panels, that way the load is distributed and the two bolts aren’t stressed out so much.
Now this is something you should perform BEFORE taking the whole thing inside the car. Just assemble the three panels, take help or you’ll end up scratching your interiors like I did with my egoistical self that I can do the whole thing myself, it gives you that confidence in yourself. This produce is that good. Trust me.
Now that the product is inside the car, you need to stretch her a bit (oh yeah!) to the sides to that the M6 bolts on the sides to the accessory provisions are bolted in. It’s that tension that keeps this panel in place.
Now that this is ready, you use the provided T strips to bolt the top panel to the roof of your beloved like below:
Coming to the below image, you can see the bolt to the roof, it’s not what was provided by CampingCo but my own from a different brand that happened to fit and do the job beautifully. I’d highly recommend CampingCo in providing something like this one instead of a regular bolt so that it’s more useful to hang small stuff around and help in tie down larger items.
Now, they provide only two bolts for each on the panel side of the setup, I’ll highly recommend adding two more for extra safety and load distribution. Also I recommend using self locking nuts.
Finally, they also provide two blocks that’s supposed to be at the end of the panel like the below image.
Hope this gives an idea on the installation part. The holes are M4 through which one can mount Minora cycle clamps to hold your hammer or shovel, what I despise the most are the orientation of the holes on the side panels. they crush and pinch the molle panels like below and I do not like that:
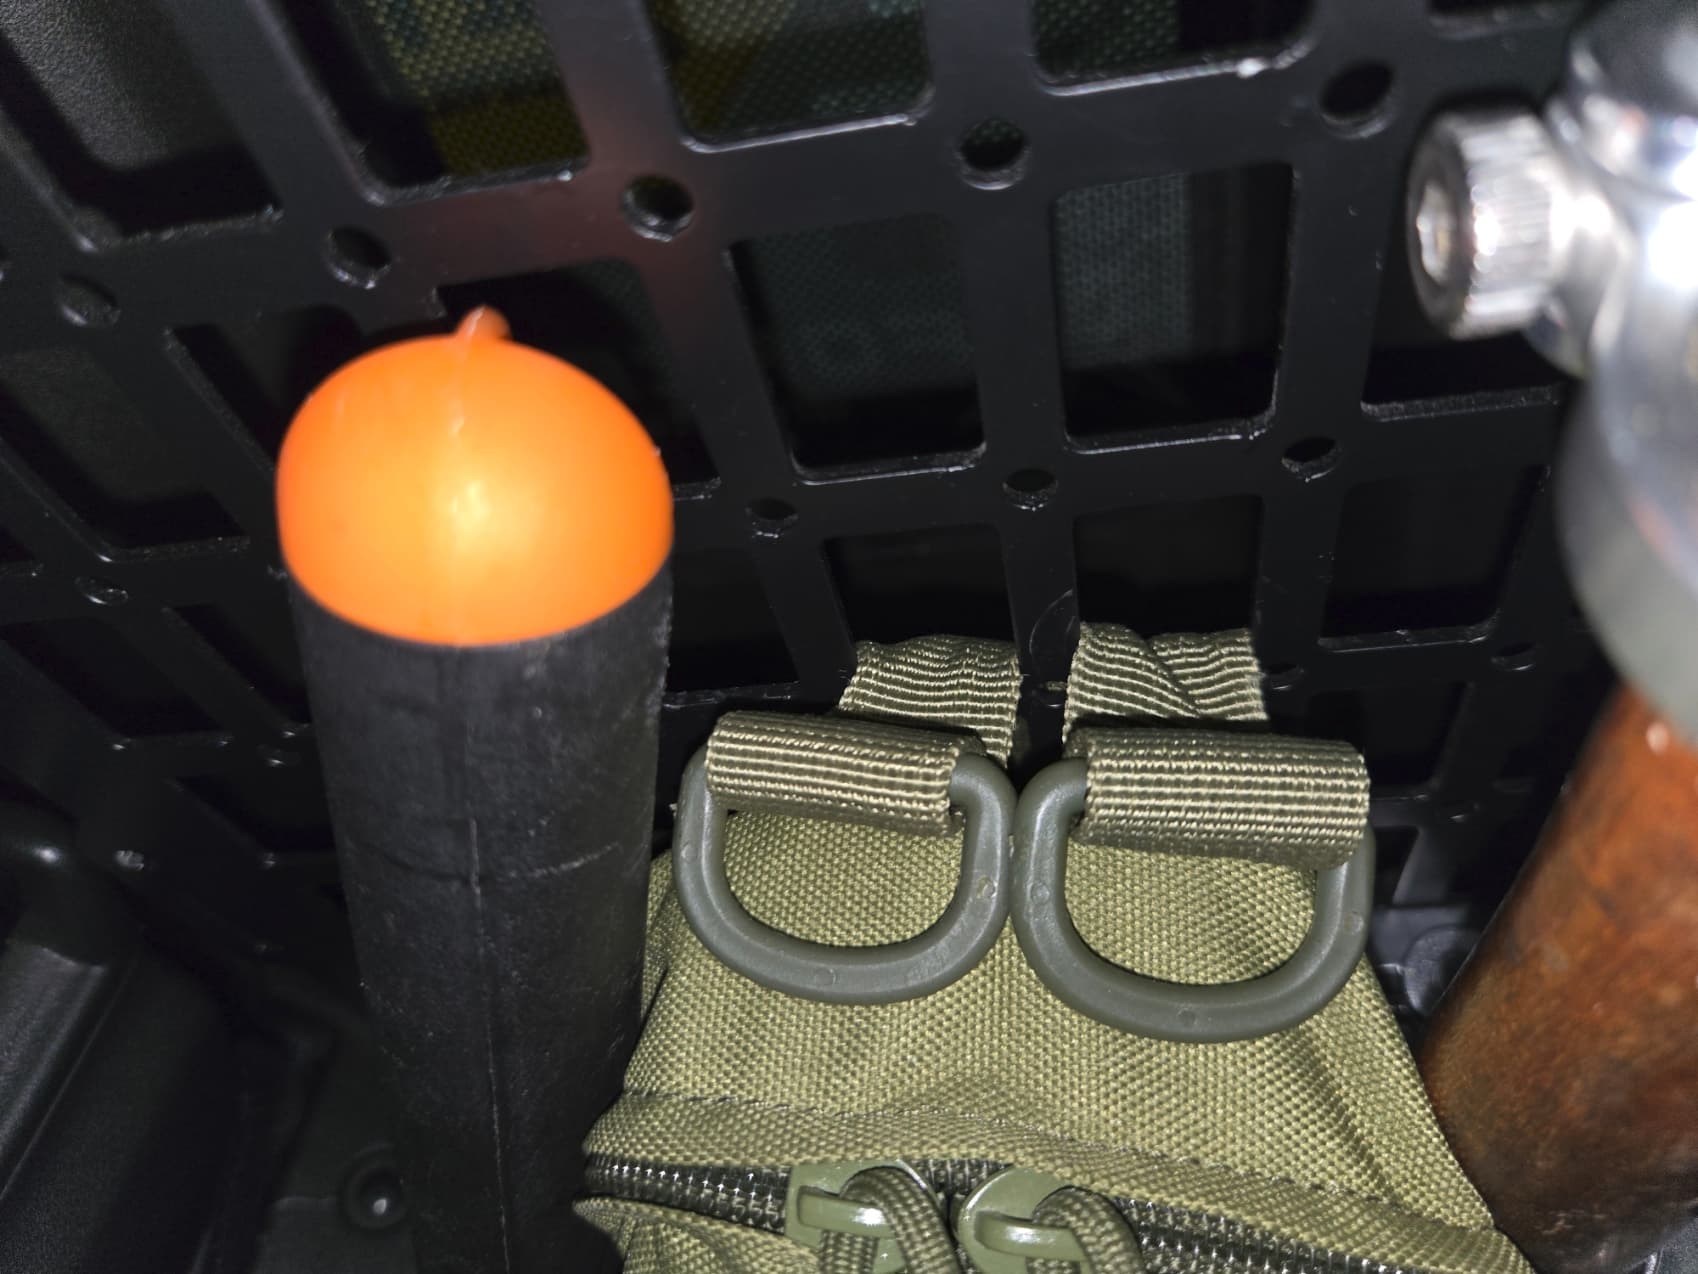
What I’ll request CampingCo is to rotate those holes 90 degrees OR provide square holes like Regnex Customz from Goa provides, that way the adding/removing the molle pouches are a breeze and not a pain. What I am not comfortable from Regnex Customz is the fact that they use the rear seat belt mount to bolt their panel up, DO NOT MESS WITH THE SEATBELT SYSTEM!!!
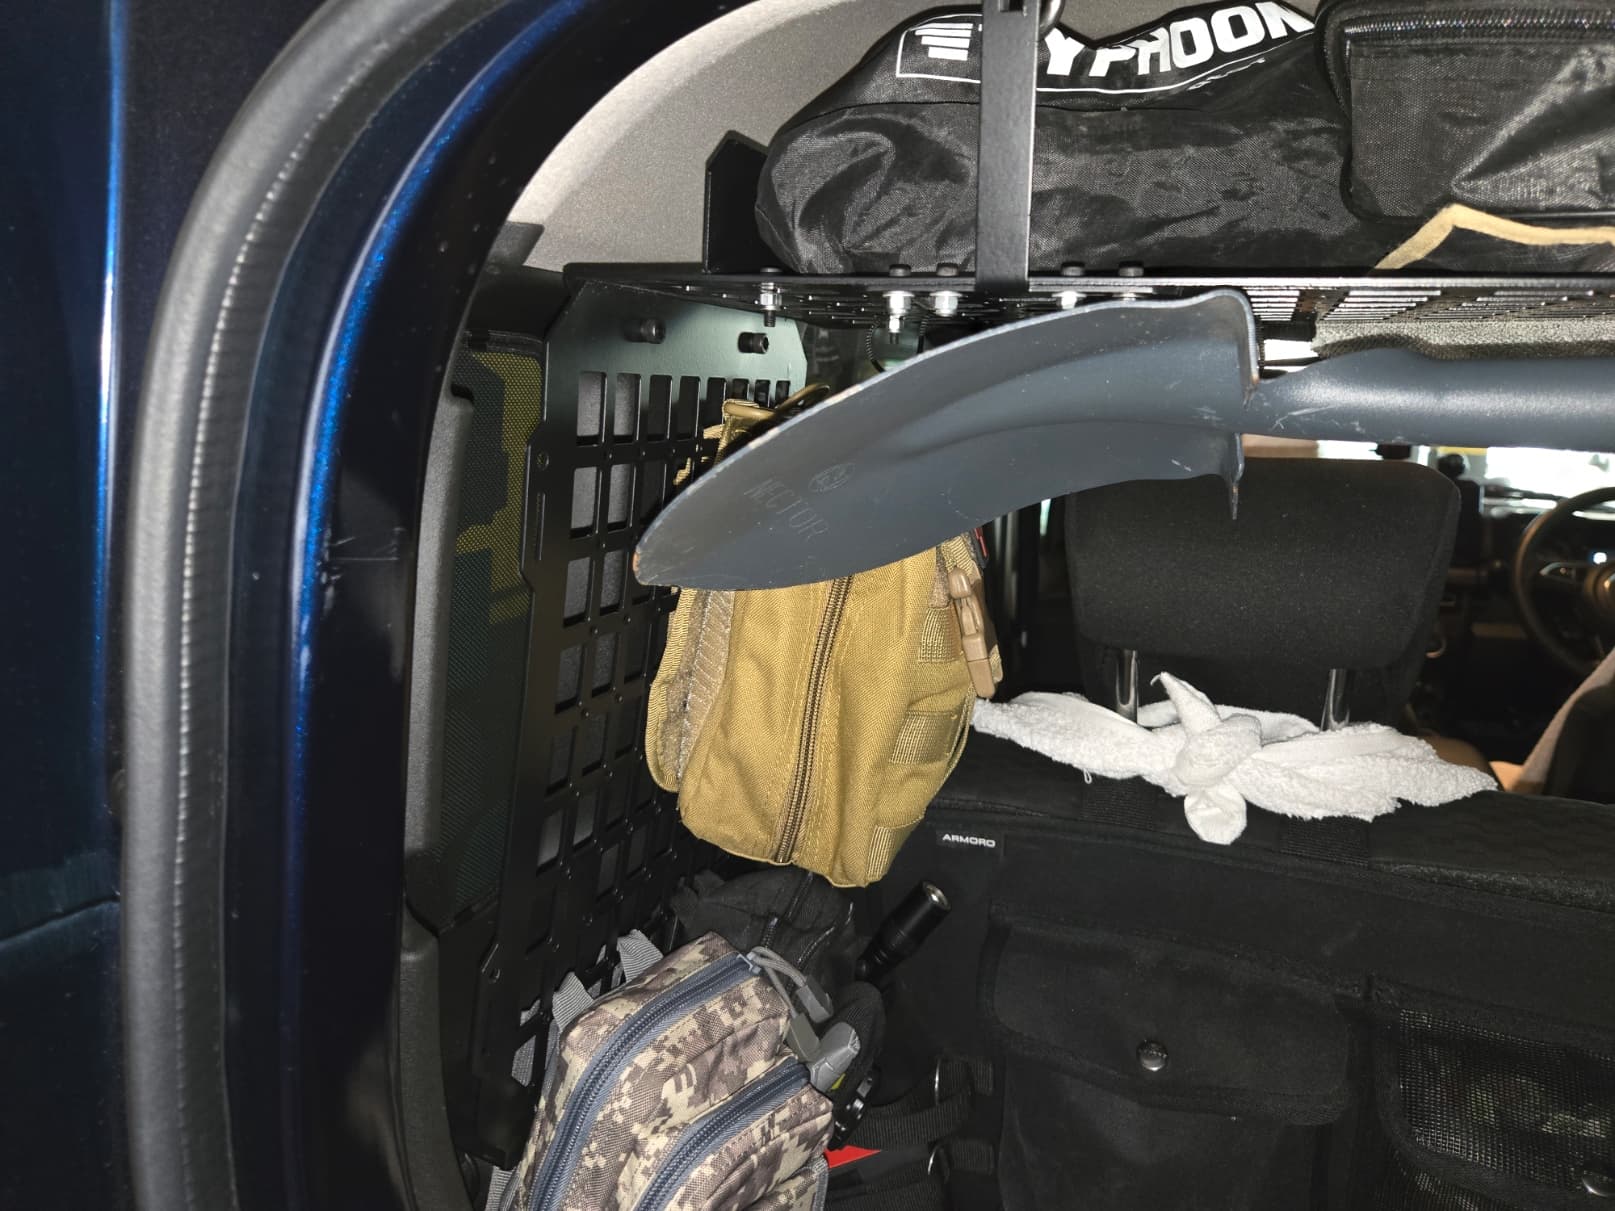
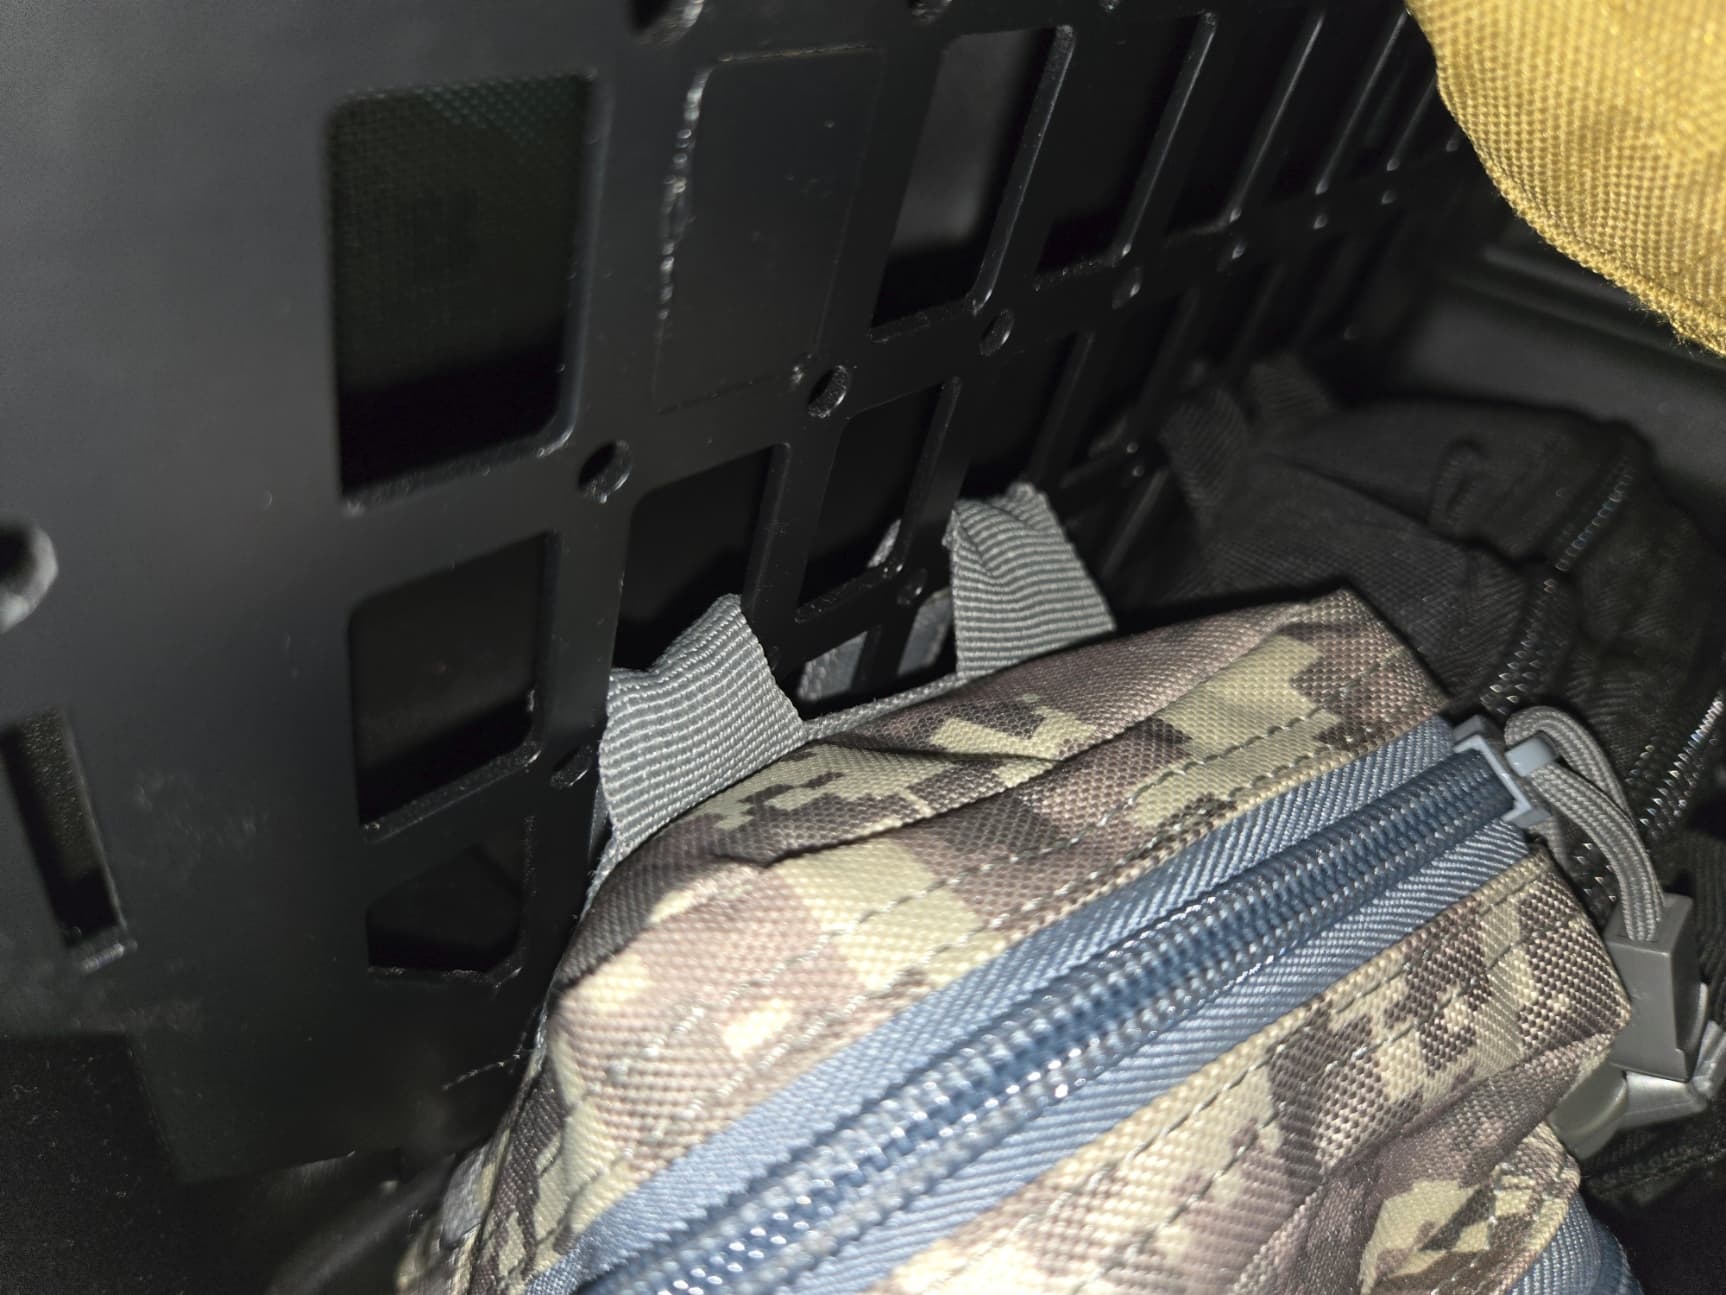
Now coming to the safety aspect, the panel does protrude a little into the rear passenger, just enough for the back of your head to go crashing in case of any untoward incident, here’s my solution for that:
No the most ideal, but I’d prefer if CampingCo gave some accessory or cushioning from the inside to protect the users, that’ll be amazing.
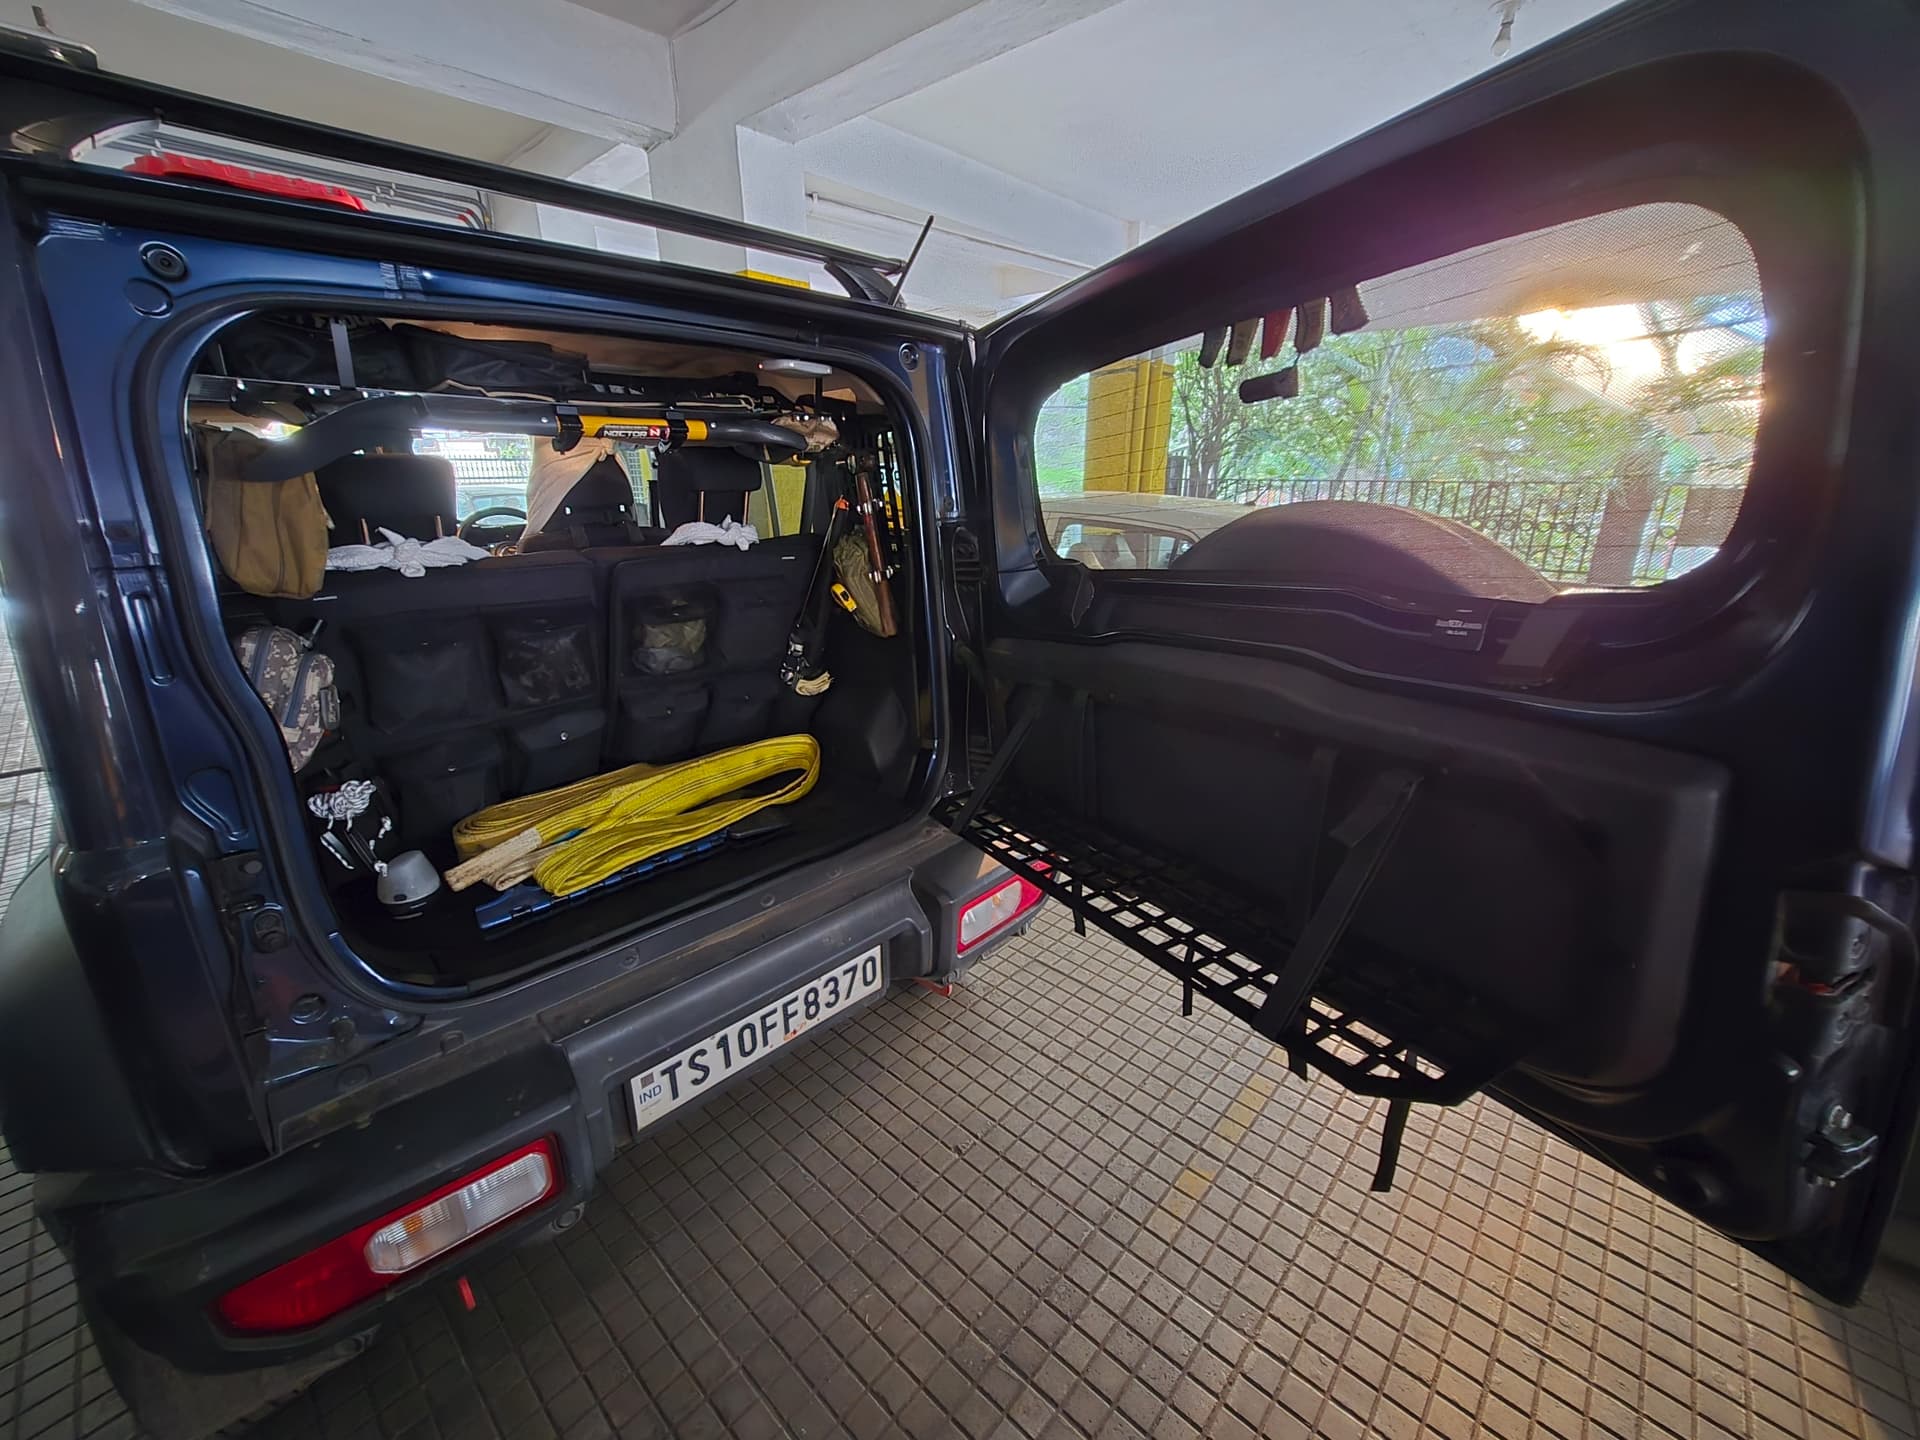
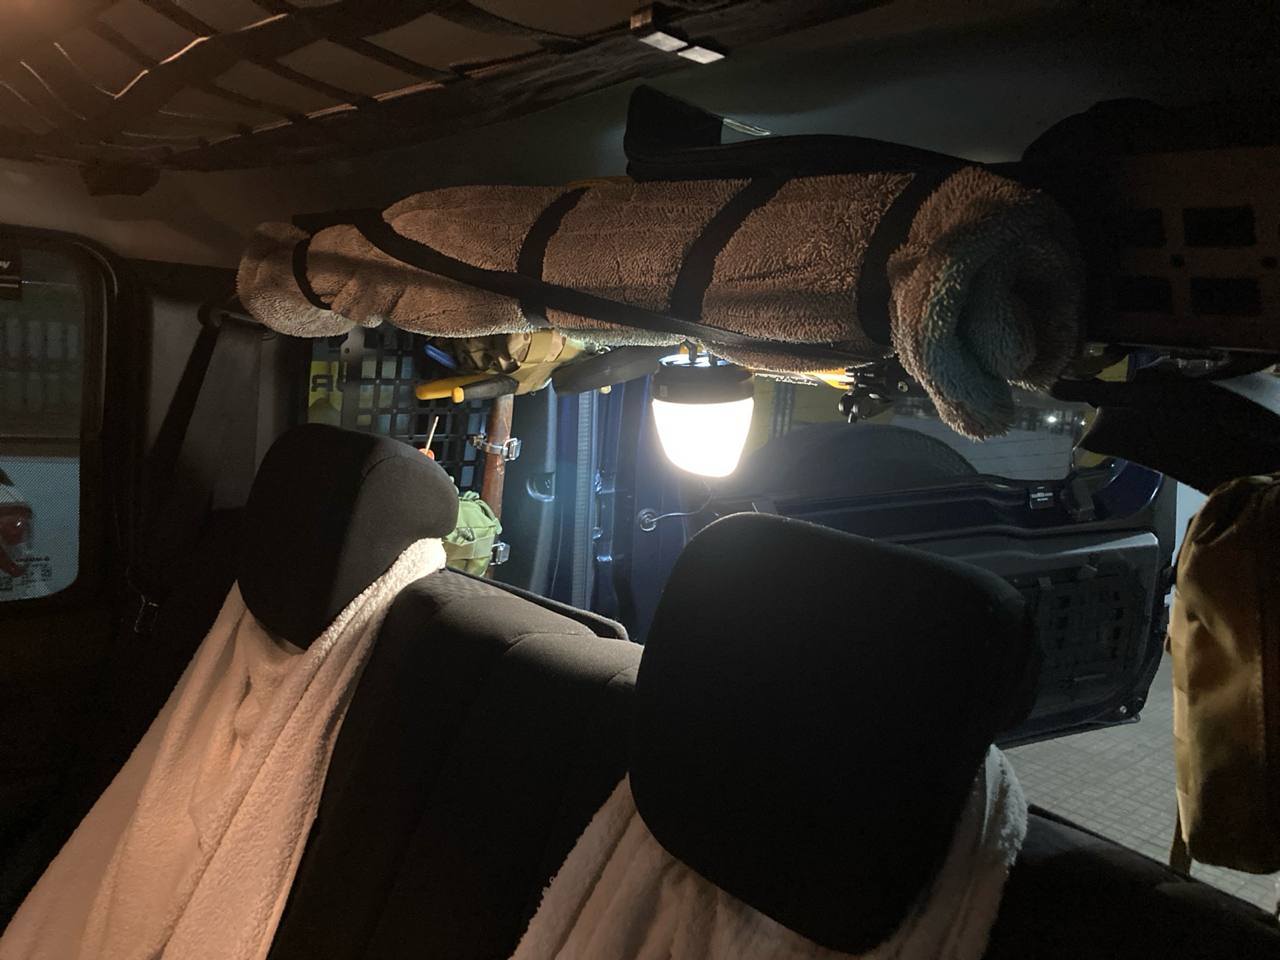
Rearward Visibility - now that’s an interesting take, it shouldn’t be an issue for stock seats, but for folks like myself who have seat height risers and are tall, yeah, we’ll be missing the top two inches of the window. In my first image on top where you can see the rear door window? the visibility above the dash cam is lost. Basically that.
Overall it’s a great product that does what it says its supposed to do but with some flaws, still functionally, it aces.
The Rear Door Table
I was actually hoping for a lot more on this one, maybe blame me for that? OR maybe the product itself is a let down on it’s own and needs a better design. Now I’m not saying it’s bad in any way but it definitely needs to be better. To start off with the installation, it’s a decent enough product, just that it need not have extensions on all sides to mount the bolts. Could’ve kept the holes for the bolts on the frame itself instead of extending it all over, I had to make a couple myself due to that issue:
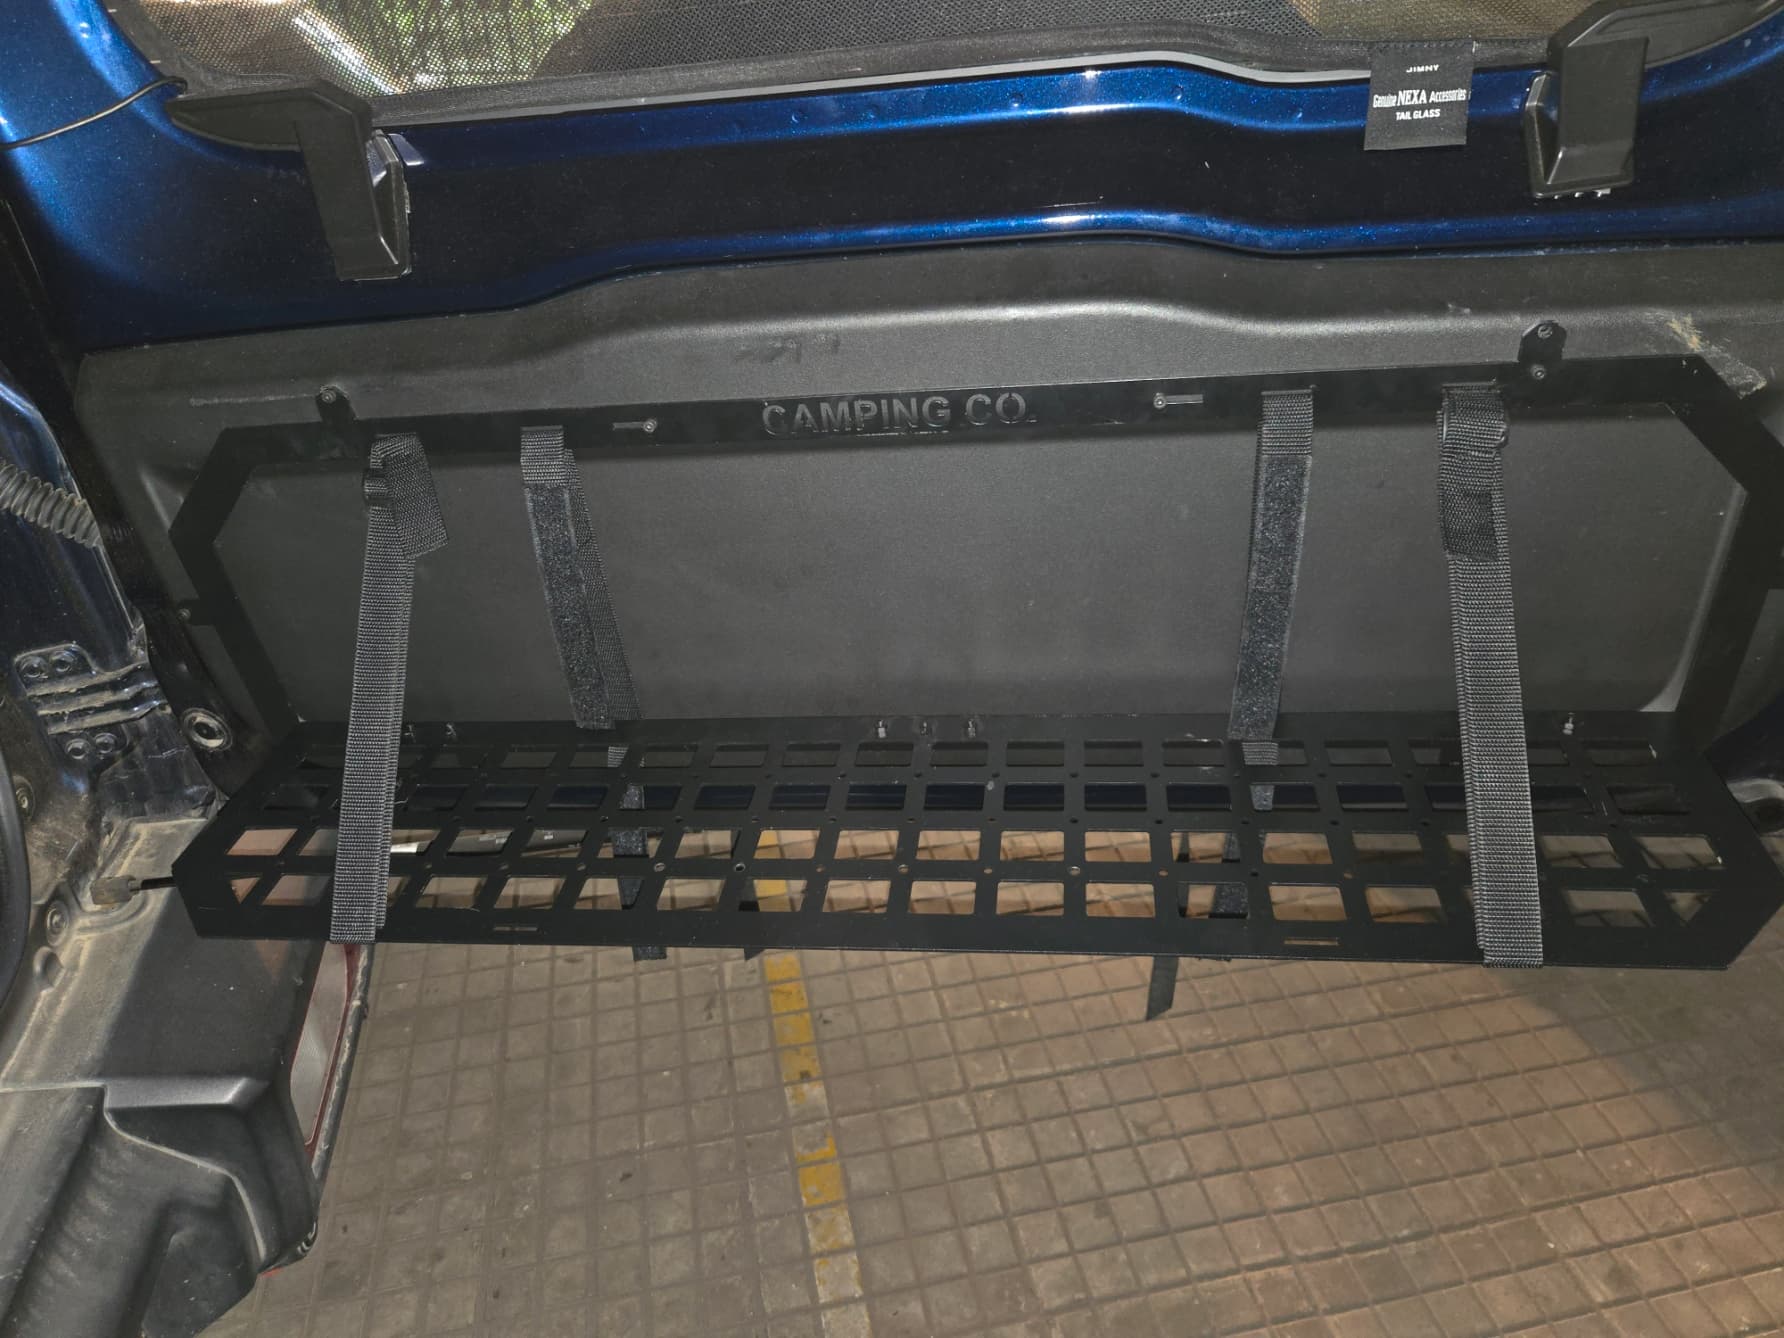
On the above image, the hole on the right side extension is useless as there’s a plastic trip on the back, so I had to drill my own on the panel itself, now coming to the middle, thankfully they had already provided provisions and I was able to use that one to keep the table sturdily mounted. to the panel. Had to add two more of the bolts. I with they give self locking nuts with sufficiently large washers for larger surface area to hold on and spring washers for added assurance.
Now, if you’re able to use all the bolts, it’ll be sturdy and not sag around, BUT the table itself isn’t sturdy enough, Sure it’s okay for light weight utility like keeping at max of 5-8KG of tools or kitchen utensils spread over, but actual cooking cannot take place on the table because here’s why:
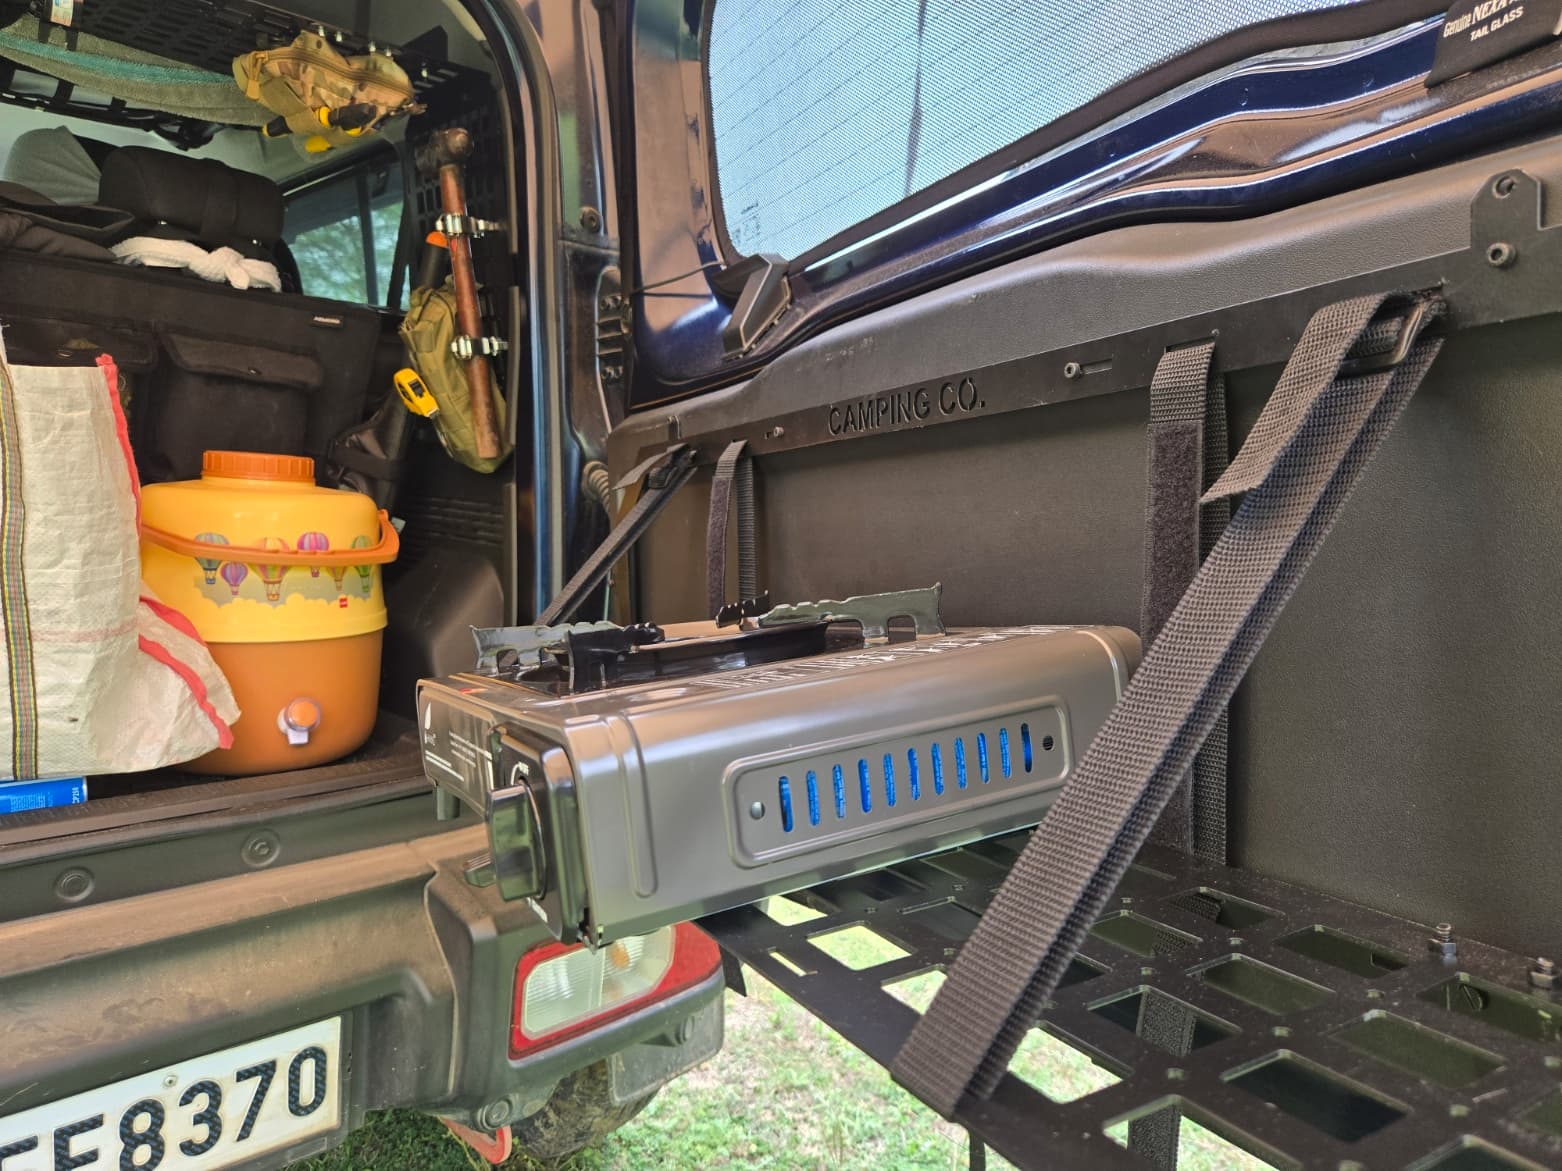
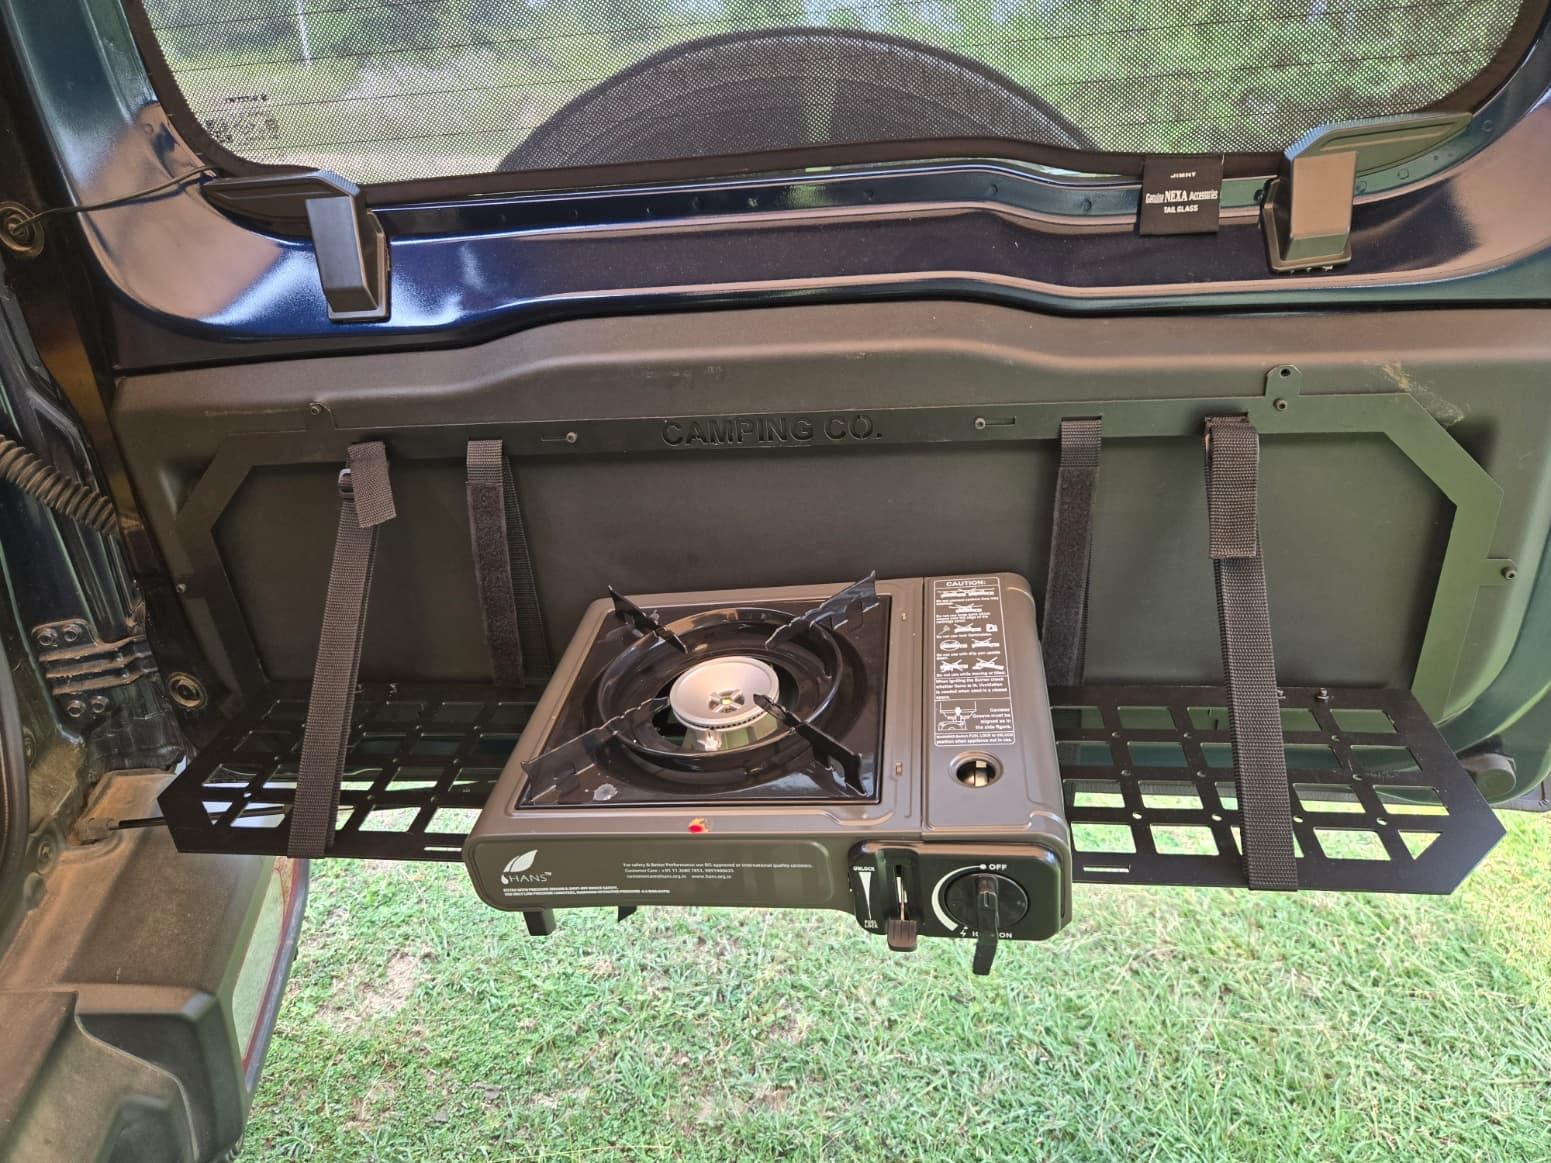
It wouldn’t support butane stoves, maybe it’ll hold the smaller candle type stoves, but I’d not keep any stove due to the below facts:
- it’s mounted to a plastic panel,
- it’s bolted to a plastic panel.
- the plastic panel is mounted to the door using plastic clips!!
too much plastics and flammable items in close proximity to the table and I’m absolutely not comfortable using a stove at that proximity.
The other issue is that the table itself is not flat, partly due to door opening outwards and slightly upwards (about 10-15 degrees?). So the table must be designed to negate that door tilt to provide a nice flat surface.
The holes, god they’re awful, too much holes for a table, I mean, I understand it’s supposed to double up as a molle panel but that defeats the purpose of having a table itself, just not practical enough. Also, please do not use that as a molle panel, get a proper one like above, the reason being having a molle panel on the door eats a good chunk into the boot space. Just plain impractical.
What’s best will be
- to have a couple of inches more (HA!!) in the width to accommodate the stove
- angle corrected to be flat/parallel to the ground and not the door.
- no more holes for gods sake, they’re useless for me.
- give something like a metal wire or something strong at sides and in the middle for the table, the plastic double D rings are just not inspiring any confidence.
- use a sub-frame to mount to the existing holes to the door and use welded nuts on that sub frame to the table, literally replace the plastic panel and make a huge table, if possible give it telescopic legs for added support. OR not, just make it sturdy enough so that it takes 15 KGs and doesn’t sag. Don’t need more, don’t need less. Just good enough like the molle panel.
Now coming to the load capacity itself, if I place anything more than 7-8 KGs the table starts to sag down, it’s just not sturdy enough. The provided double D rings aren’t inspiring confidence at all.
so enough bashing, what’s the good stuff?
Well, it doesn’t rattle despite the crude construction, the hings are good, they’re the good old door hinges if you observe the in images, welded to two sheets of metal, I really appreciate the simple method of construction, reliable enough, just that it’s not practical enough. I truly hope they fix that in future iterations and provide me with a replacement, and I’ll happily bear the cost difference to have something actually usable on the tailgate and not carry a decathlon table when camping.