
NOTE:- THIS SELLER IS NOW BLACKLISTED. PURCHASE AT YOUR OWN RISK.
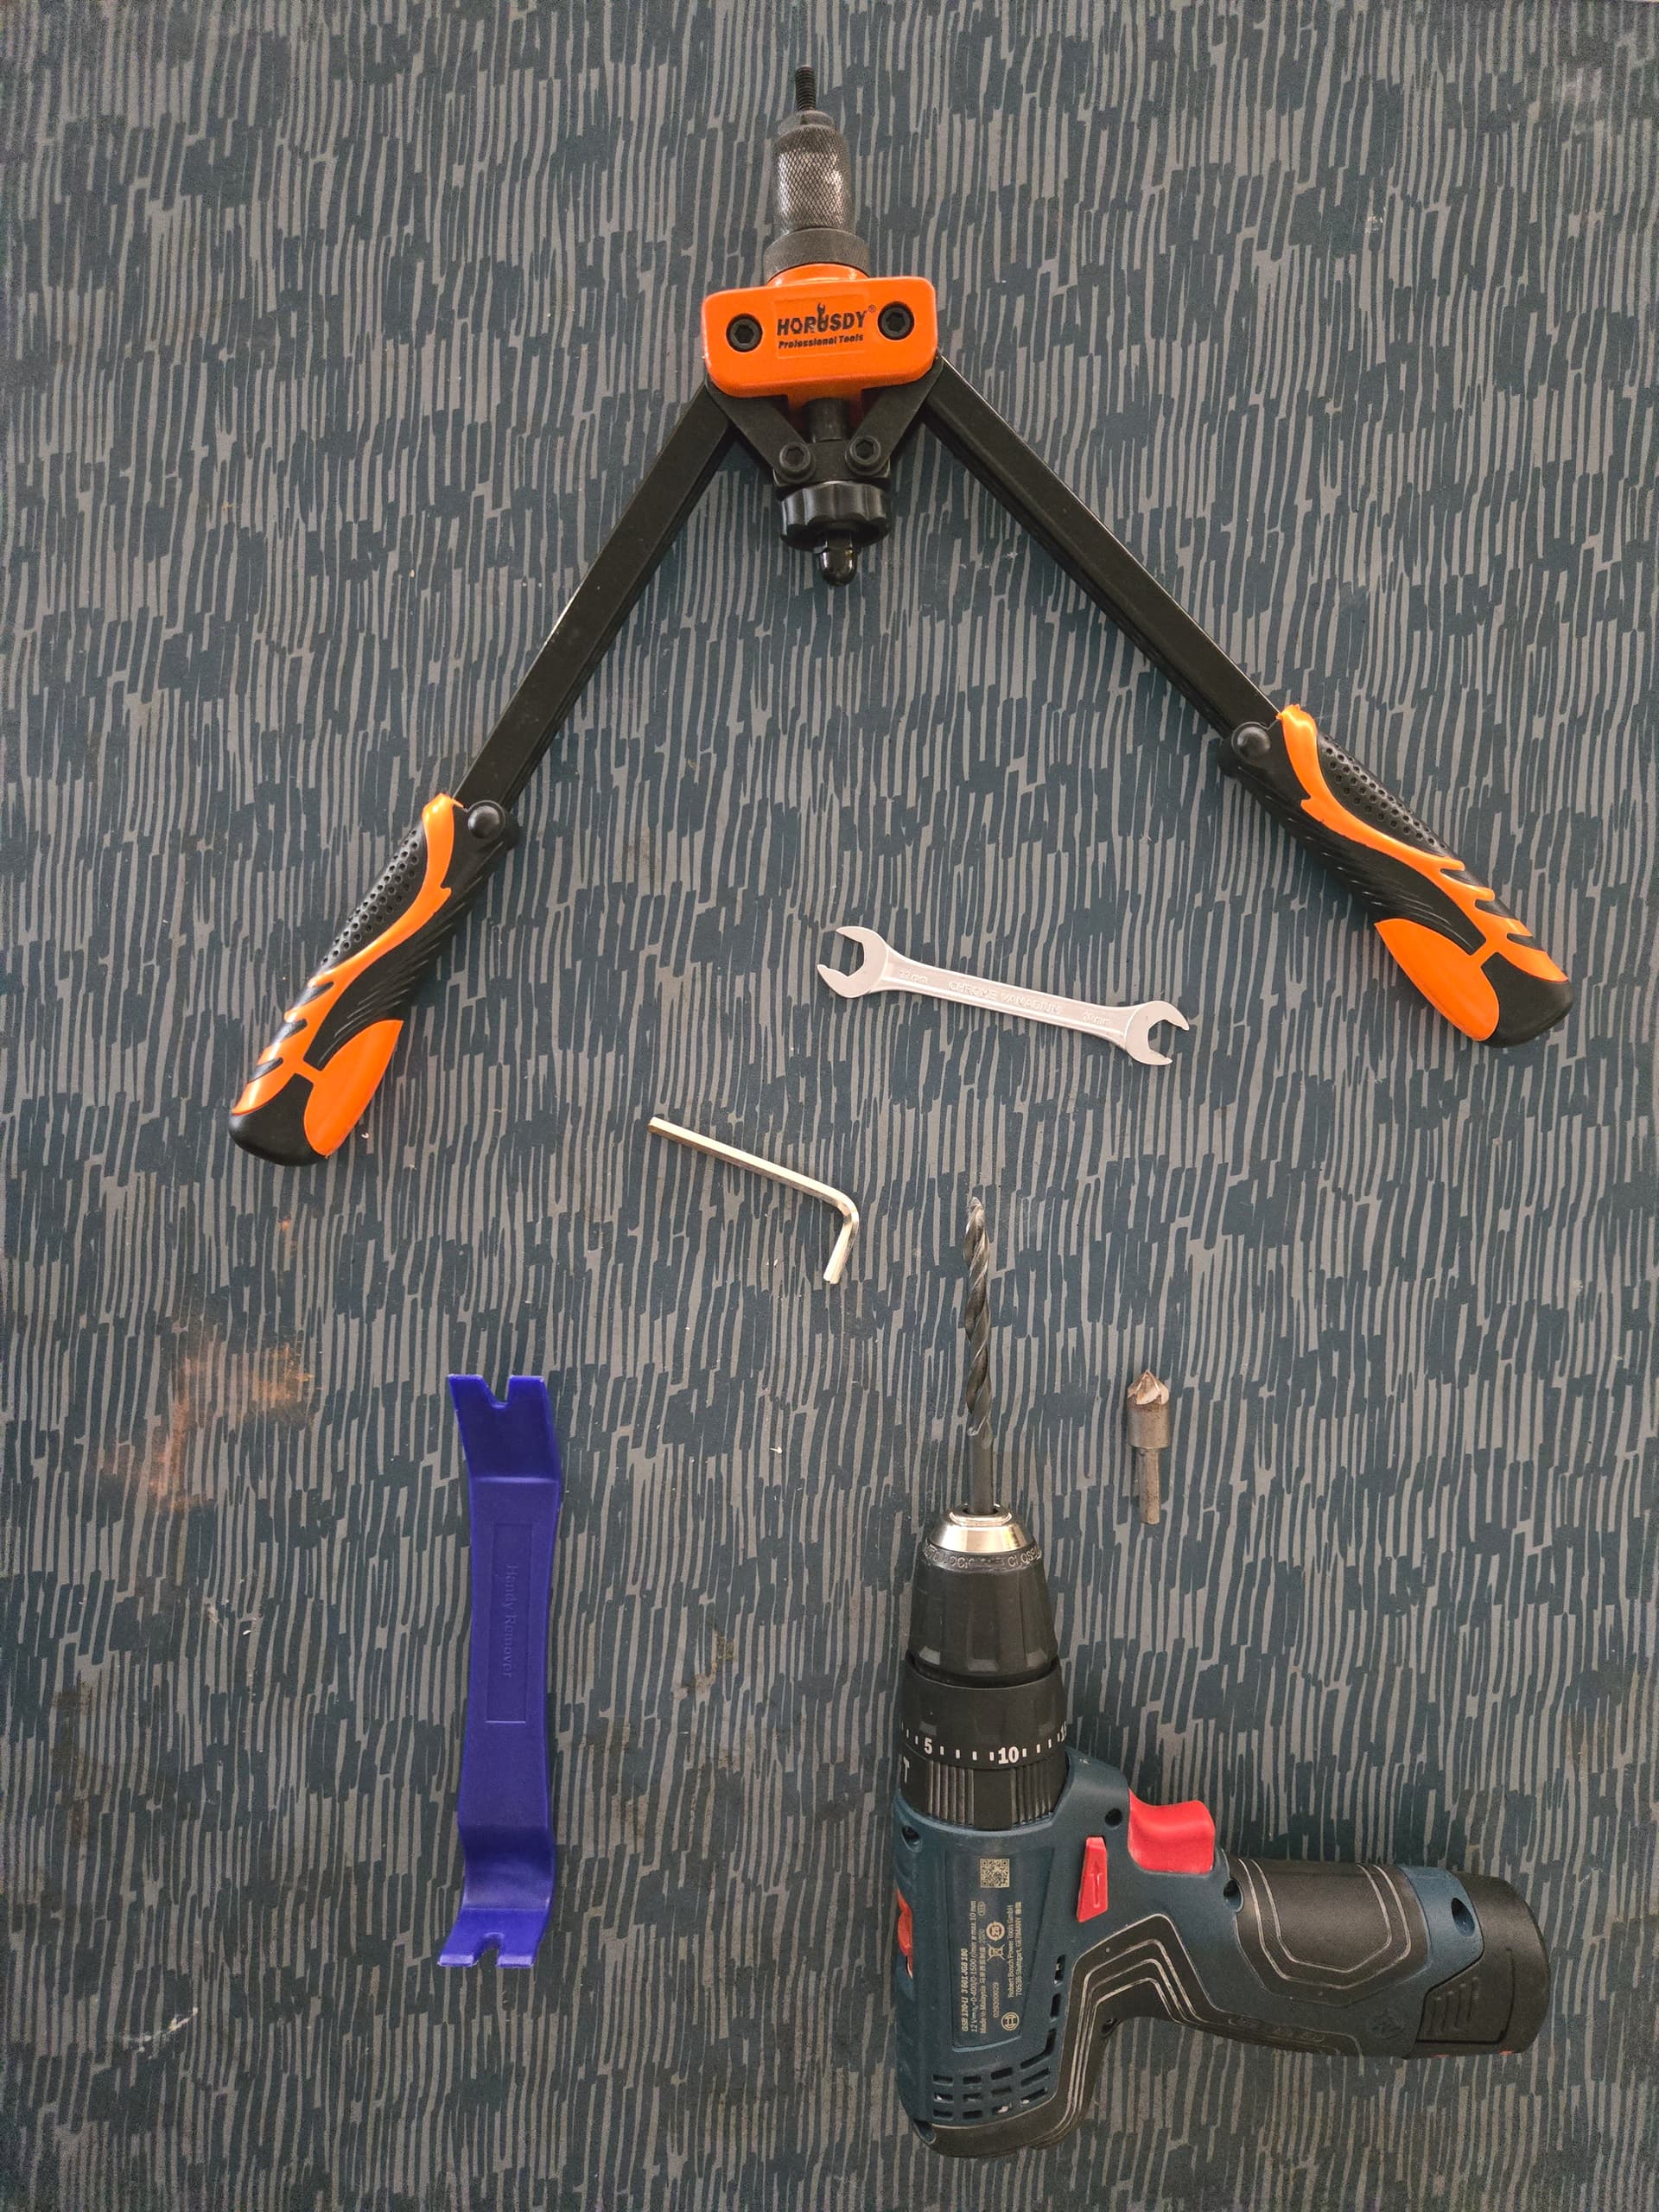
So, coming to the table itself, below are the tools one requires:
- 10mm Spanner
- 8mm Drill Bit
- L Key set
- Pry tool
- Rivet Nut Tool
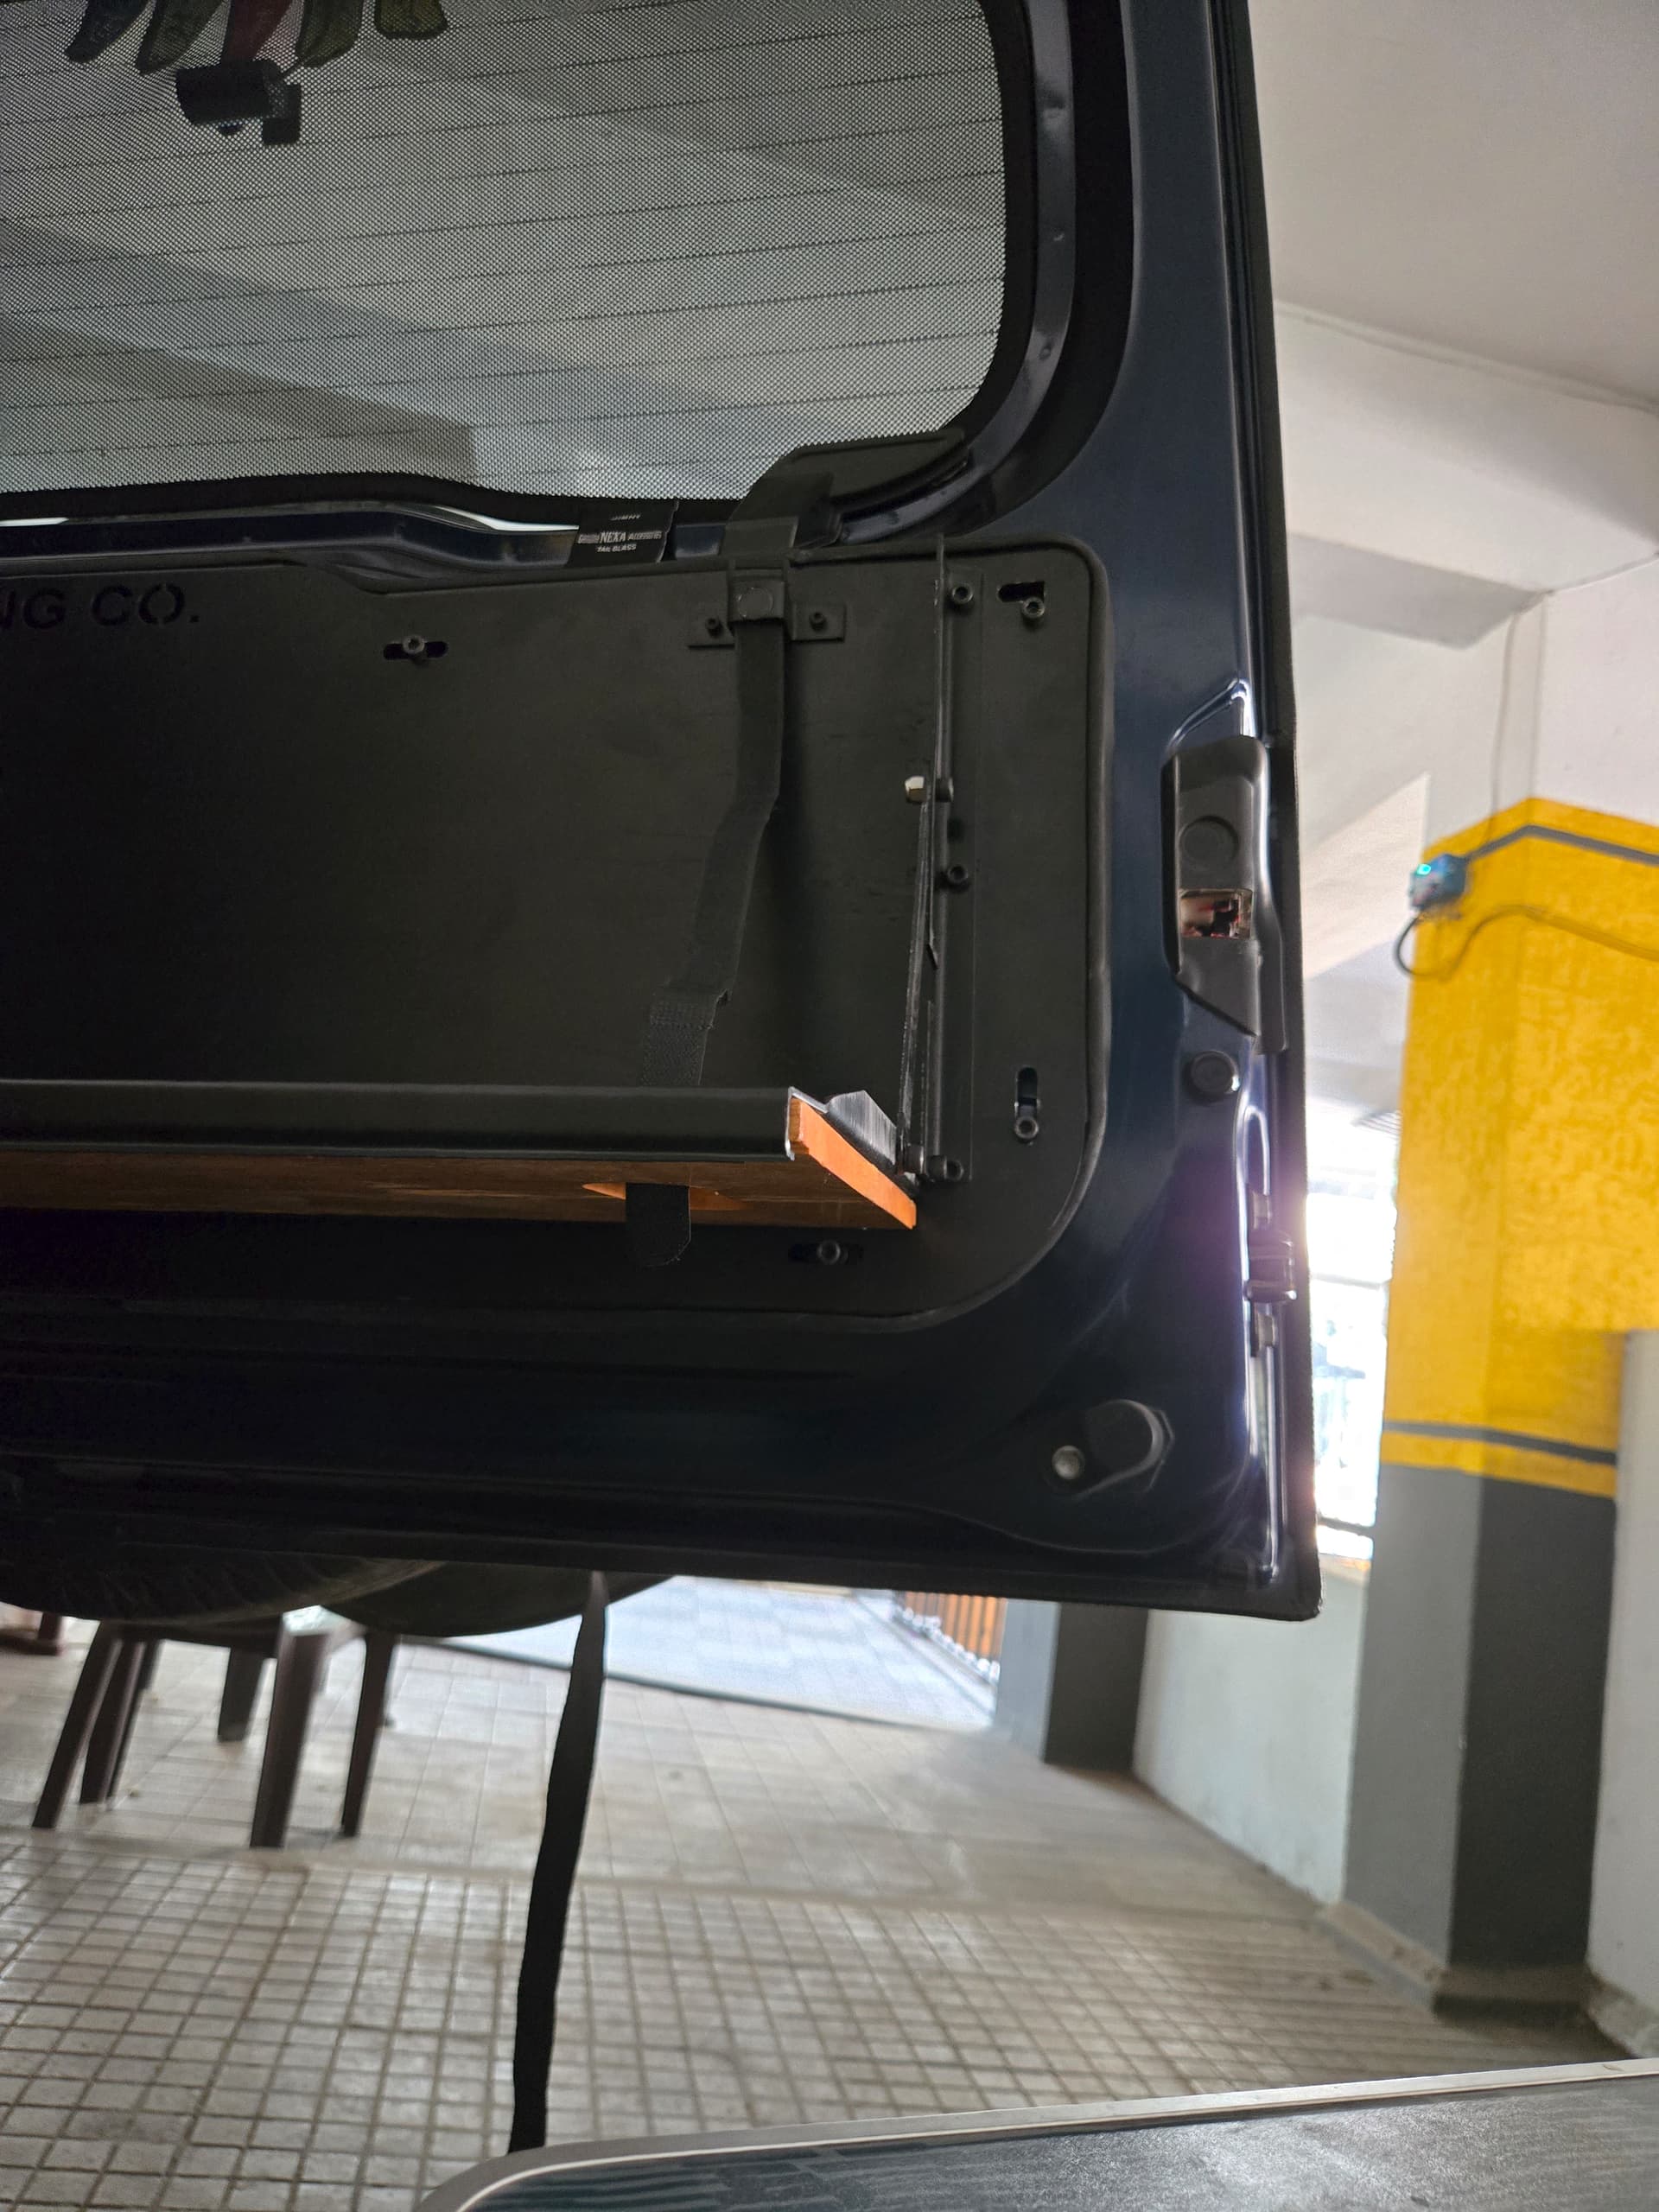
Step1 : Pry open the rear door plastic cover
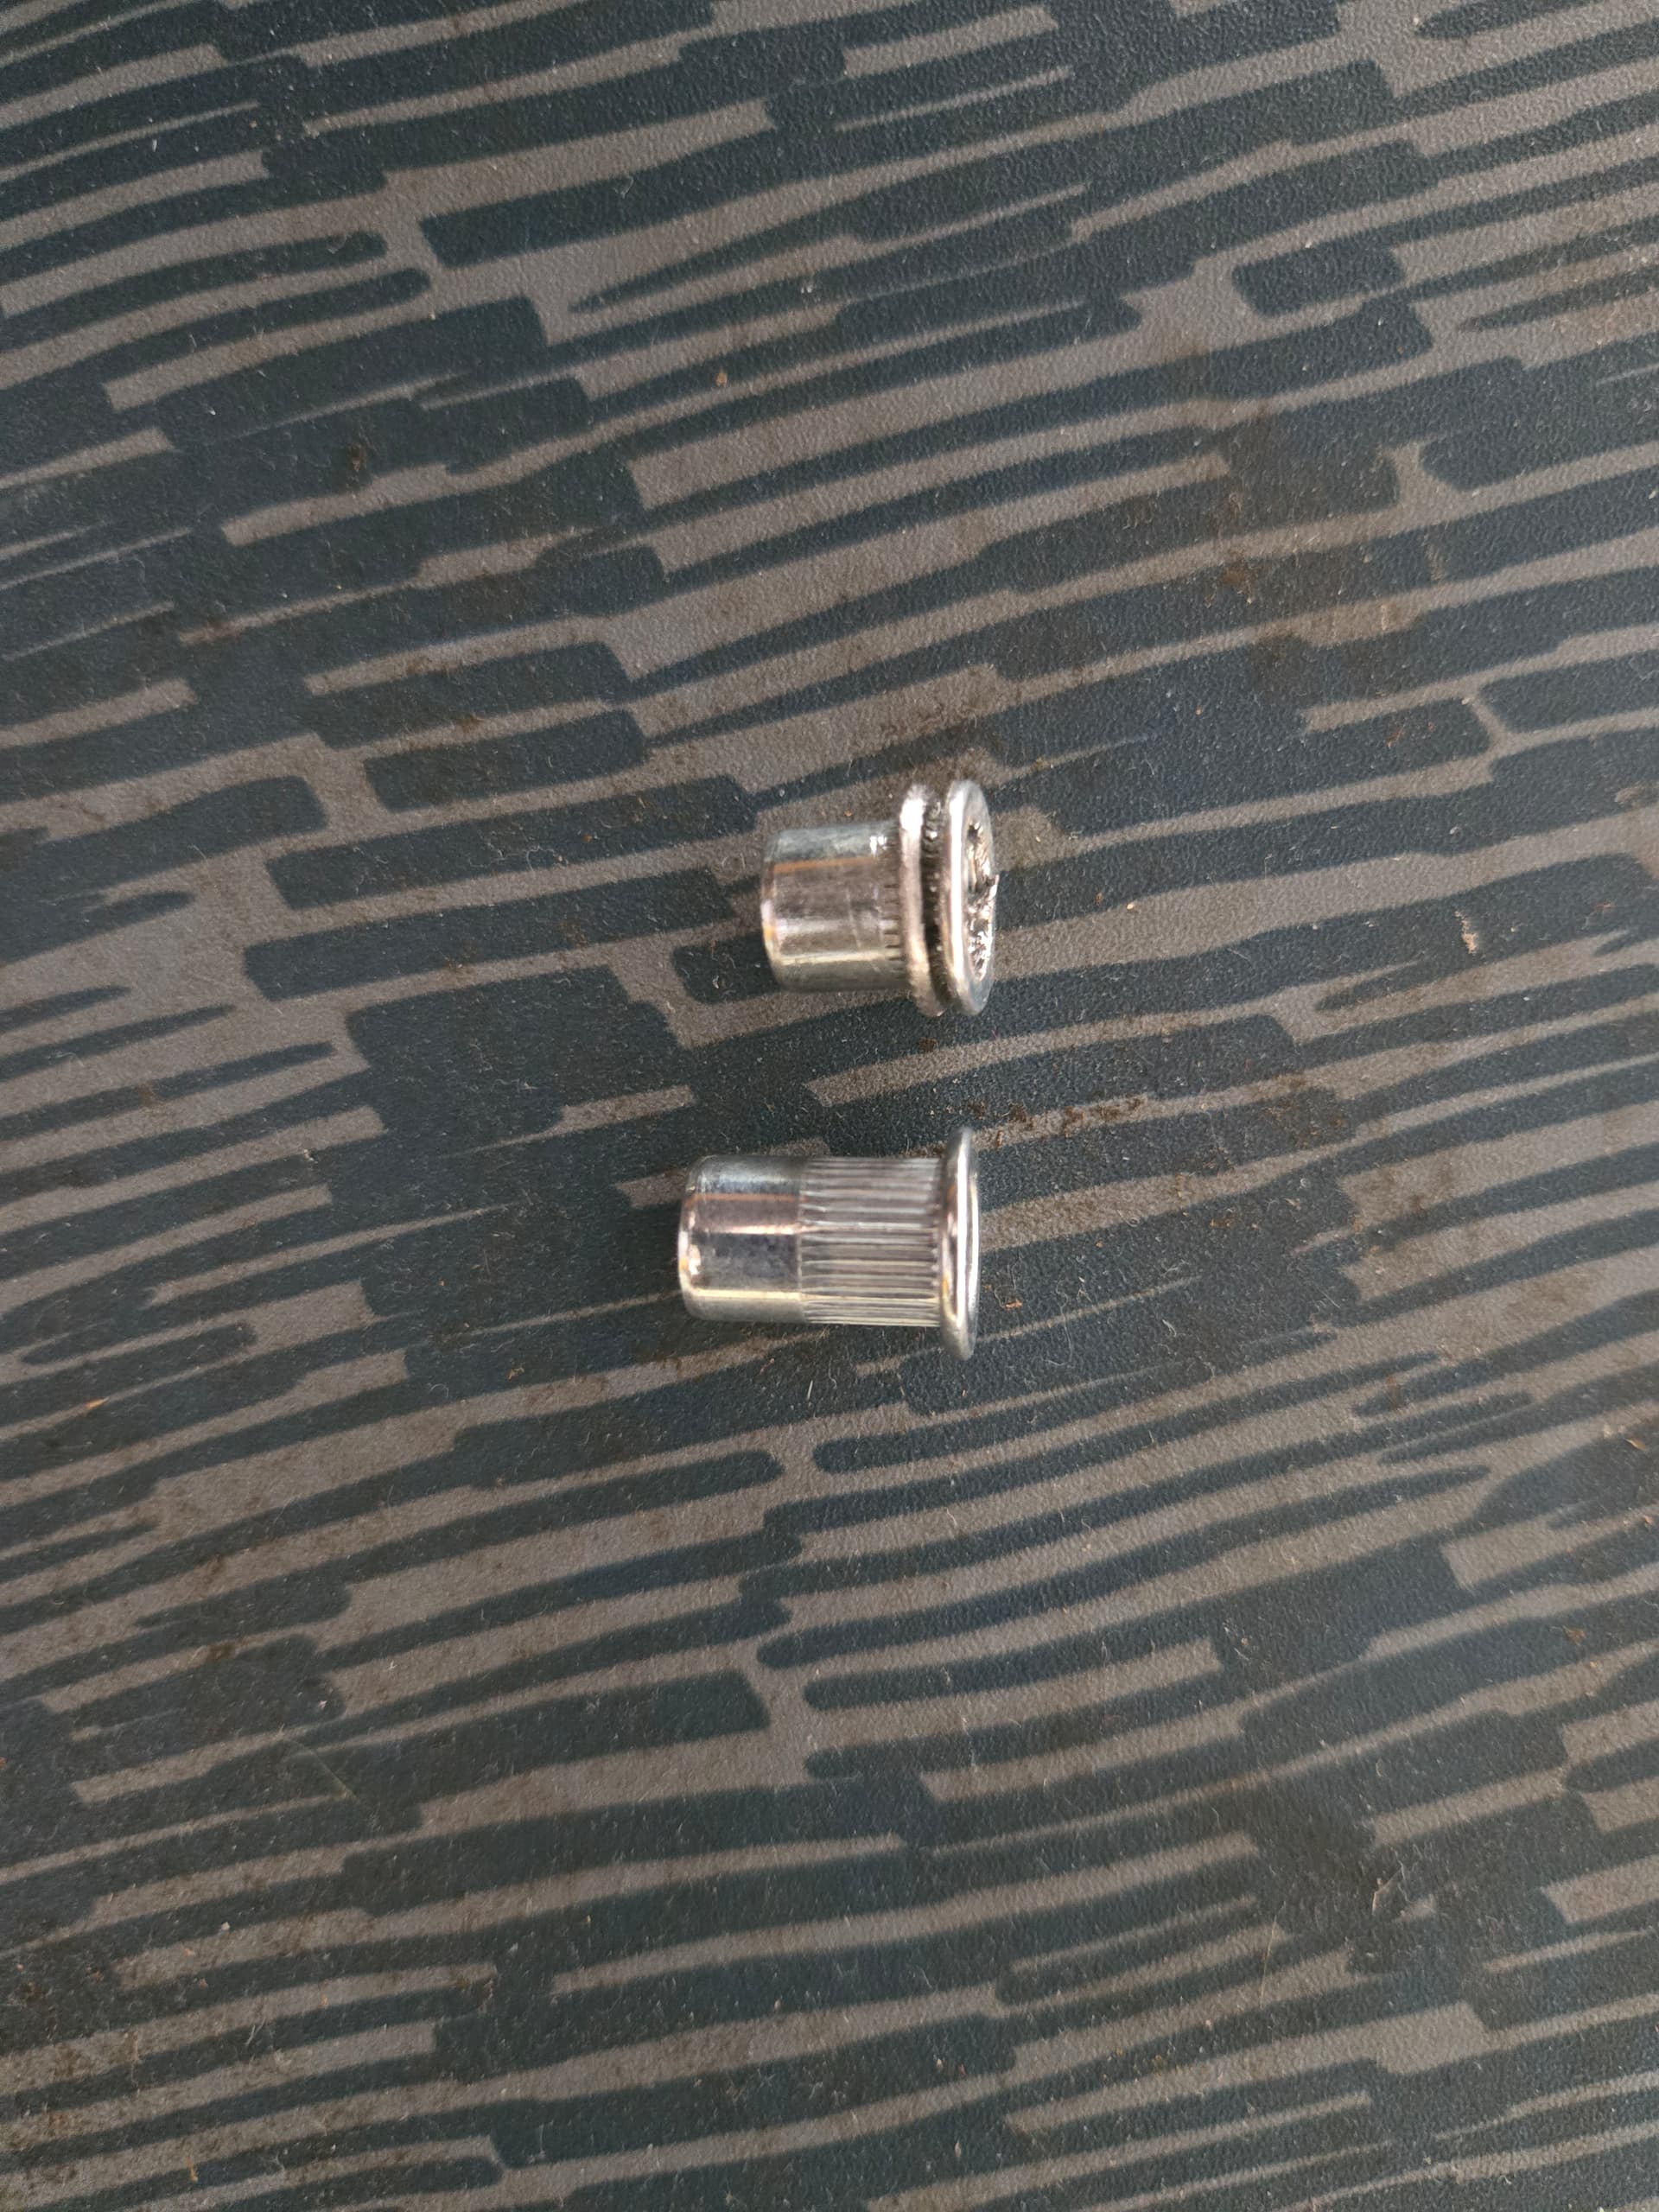
Step2 : Insert the rivet nuts. They look like below before and after using the tool.
Step3 : Take the whole table apart, all the nuts and bolts and arrange them as per your convenience to reassemble.
Note: Here is where you would loosen and expand the left and right railings outwards and then tighten them back.
Note:- the hinge on left is different than the hinge on right, the hole is lower,
Step4:- Mount the back panel, start from the bottom first and then go to the top. longer bolts go on the bottom and the shorter ones go on top. DO NOT TIGHTEN FULLY. Just a few turns are enough initially till you get the table hooked up. AND THEN tighten the table fully.
The table will deform to take the shape of the door. This is perfectly normal and acceptable.
Step5:- use the provided rubber beading to seal the edges from water ingress.
Step6:- mount back the hinges and the railings and the table itself. IF the railings mounted to the panel is shorter, use a hammer and expand them. This is so that the hinges and the table will mount up and stay secure.
Note:- The hinge on left is different from the right.
Step7:- Mount the table back and ensure sufficient tightness is provided. Overtight, the table won’t open or close. Too lose, it’ll rattle.
Recommended to use a velcro strap. The supplied magnets are useless.
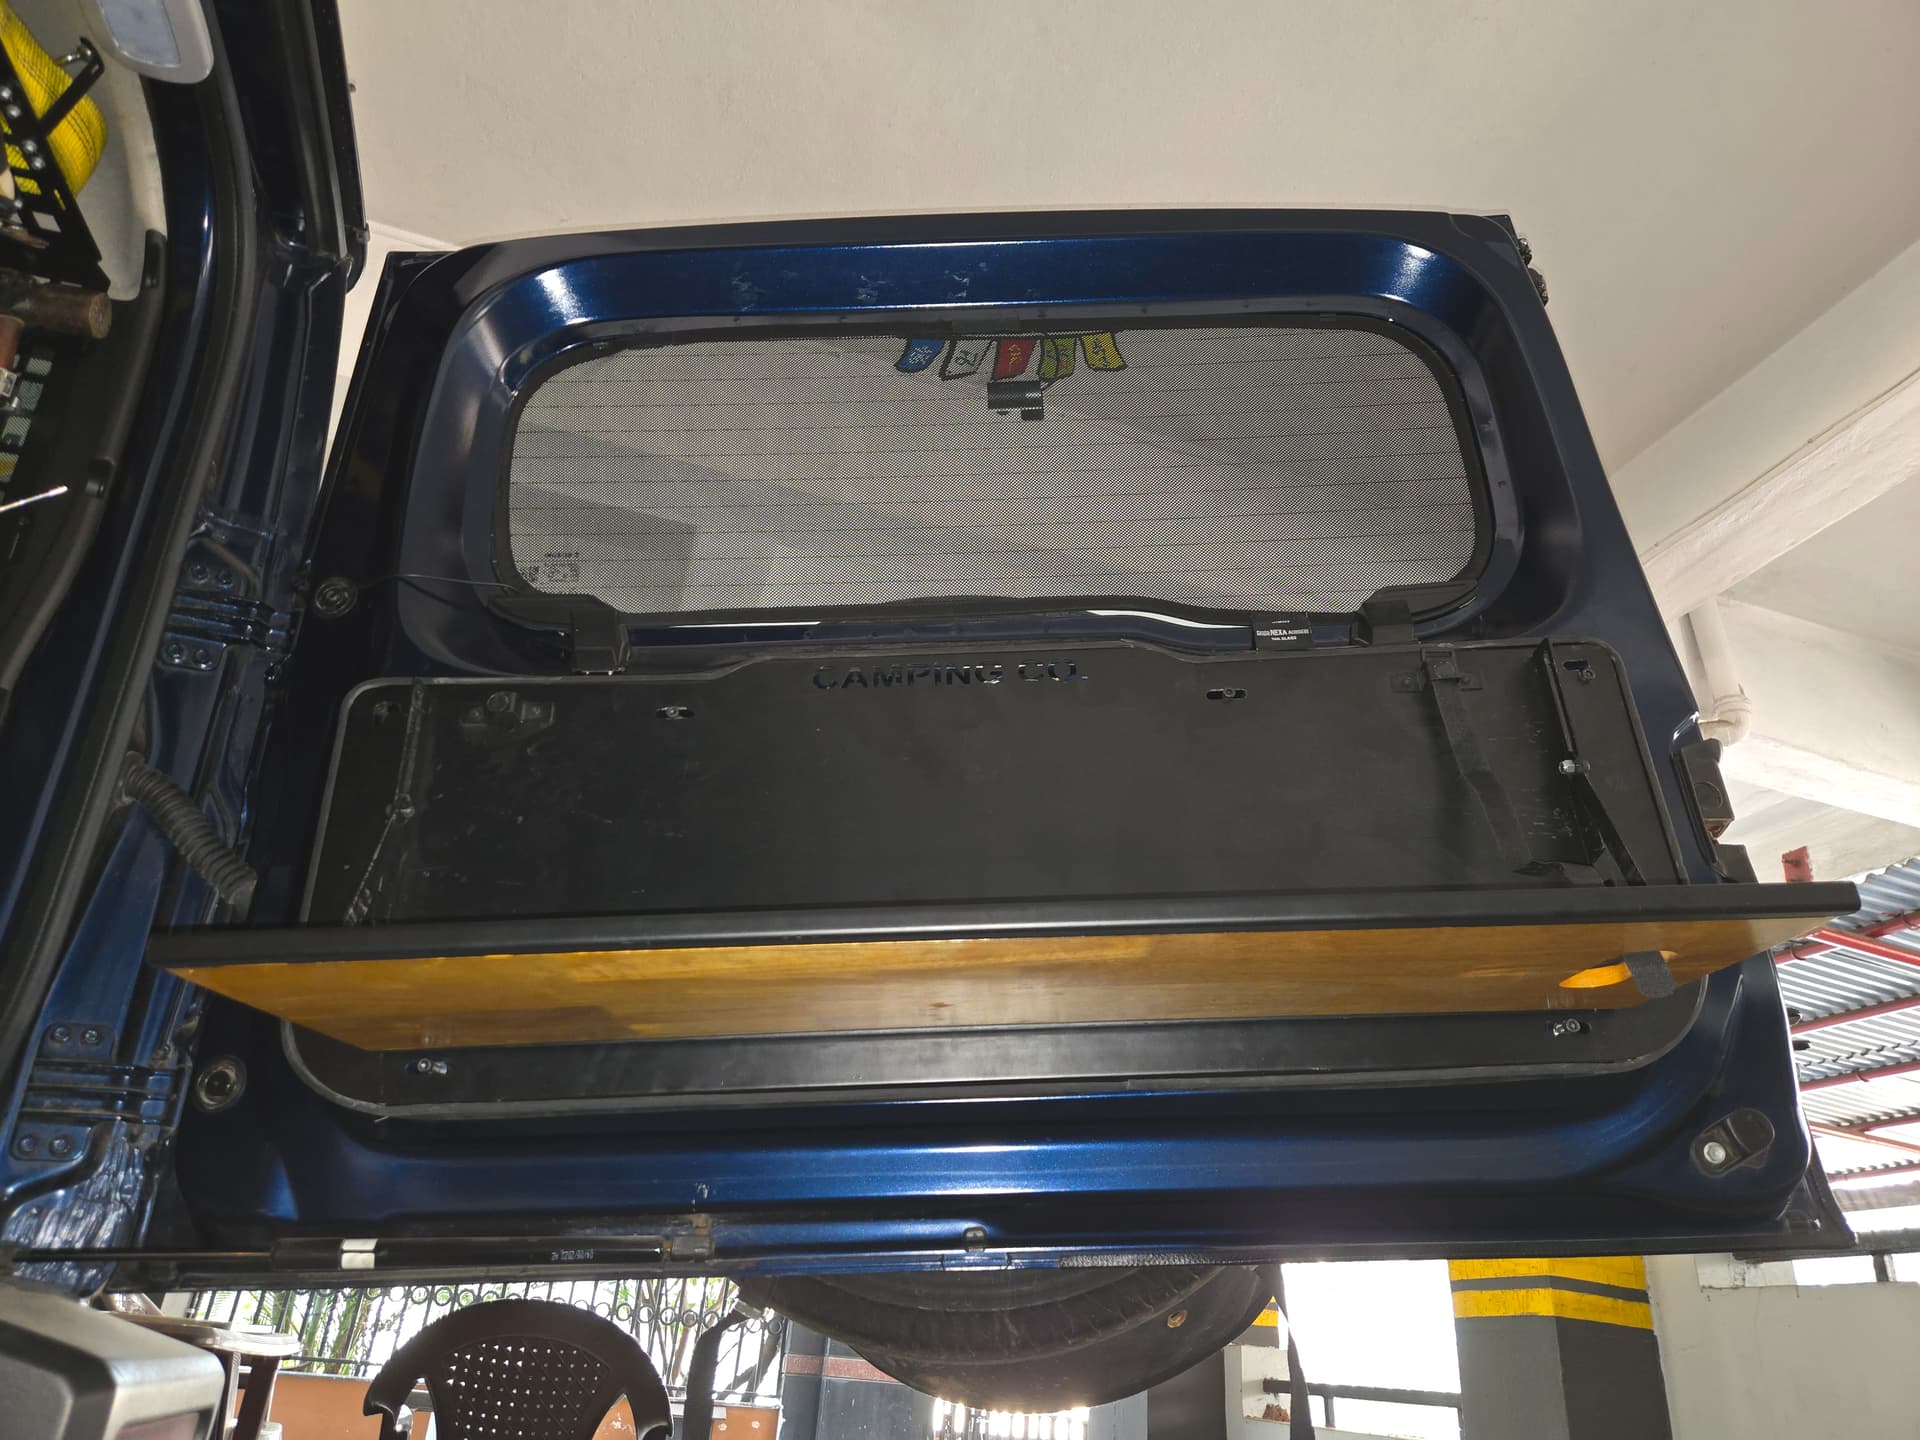
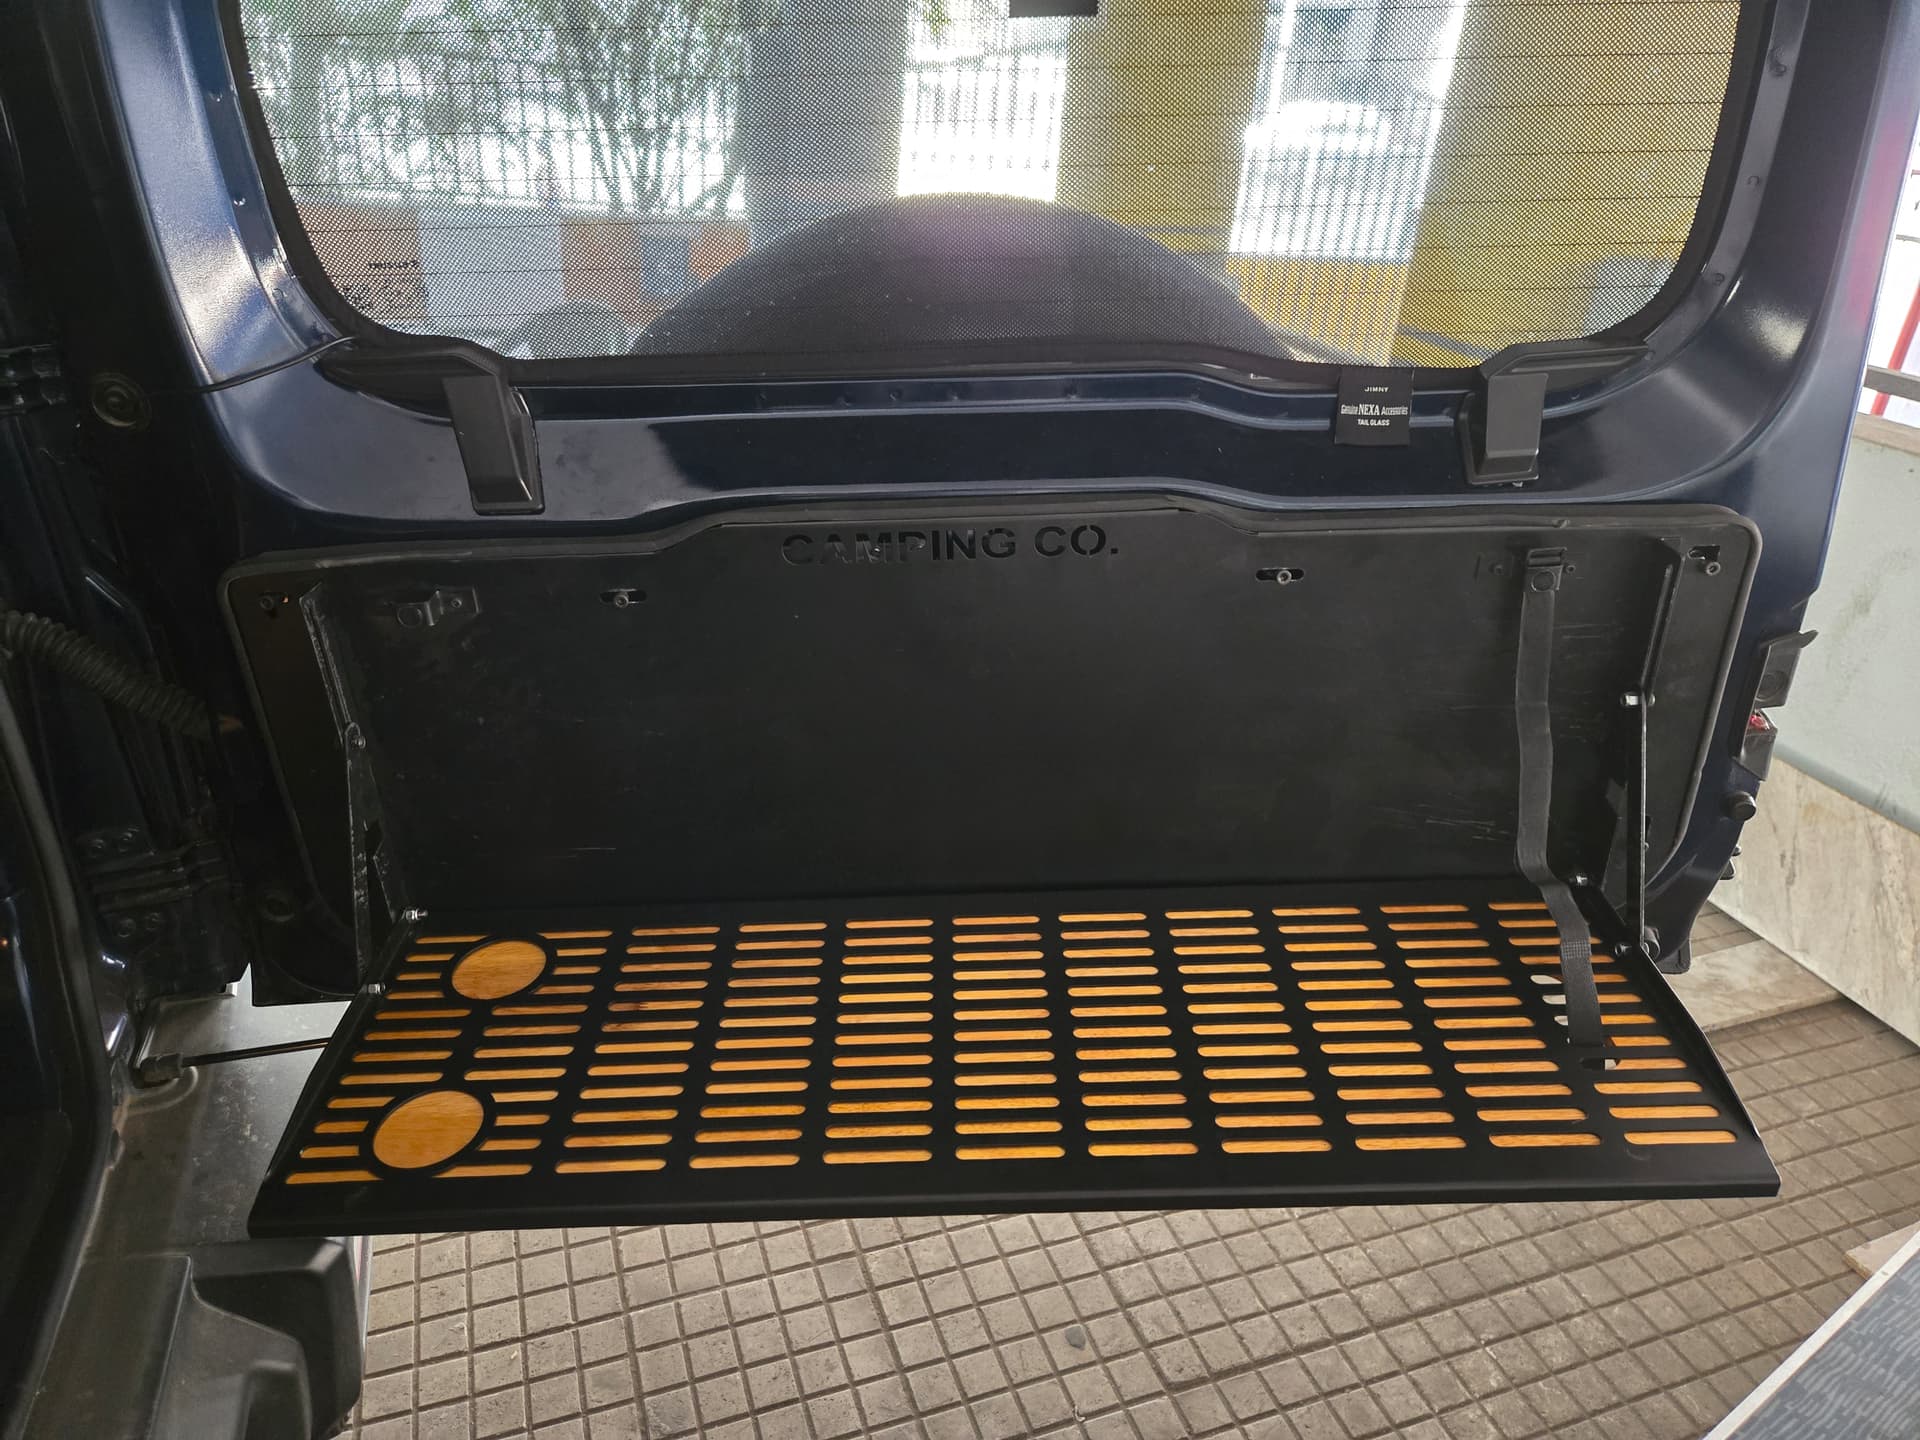
Finally below is how it’ll look:

My Honest take:-
Table is sturdy and can easily take up 50KGs. However, do not push the limits as the hinges on your car take up the weight as well. This table is good enough to keep stuff on top and the wooden extension is a nice idea. It’s a nice wide table with two cubby holes so that one can keep two cups and can use it to store the spatulas/spoons.
Does it work like a table should? sort of sadly. Here’s the major shortcomings:
- This table doesn’t compensate for the tilt angle of the Jimny’s door opening.
- The Wooden sliding is a very nice touch, but it’s finger-jointed cheap wood that’s sliding on half an inch of railing, the wood itself is cheap and will give away if pulled to the extreme and pressure applied. Mine already started cracking up.
- I would not recomend the pull out no more than 50% to 70% of the board at extreme.
- The finish is very rough, Instructions manual not provided.
Despite all these shortcomings, the table is actually very robust, heavy duty and can take solid abuse and I’ll give it a 7/10 for this.
However, the tilt angle correction is something that must be integrated. So design wise it’s a sad 3/10.
Finish and Quality? - That’s a 2/10.
that’s a total of 12/30 = net is 4/10
But you get what you pay for. I really wish the manufacturer would give a little bit of attention to the little details that actually are high impact, this would be a very close 10/10 table.
Sadly these are the options. Might as well go for the cheaper one that uses door hinges welded to the sheet metal. However, it’ll not be as sturdy or well built and heavy duty as this one.
DO NOT COOK ON TOP OF IT because the Jimny’s tilt angle isn’t compensated.
Use it to keep the spare spatulas or stuff that’s not going to be used in active cooking.
After sales service: now that’s a very bad service. I had to call multiple times to get some sort of instructions for help.
Would I buy it? Sadly yes as there’s hardly any alternatives.
Would I recommend it? Not really, but it does what it does.
I really wish we get better products than this soon from other manufacturers.